> ## Documentation Index
> Fetch the complete documentation index at: https://docs.atonom.ai/llms.txt
> Use this file to discover all available pages before exploring further.
# Build Your First Cloud Employee
> Learn how to create and configure a Cloud Employee in Atonom.
## Getting Started
Login to your Atonom account and follow along to create and configure your first Cloud Employee
## Step-by-Step Guide
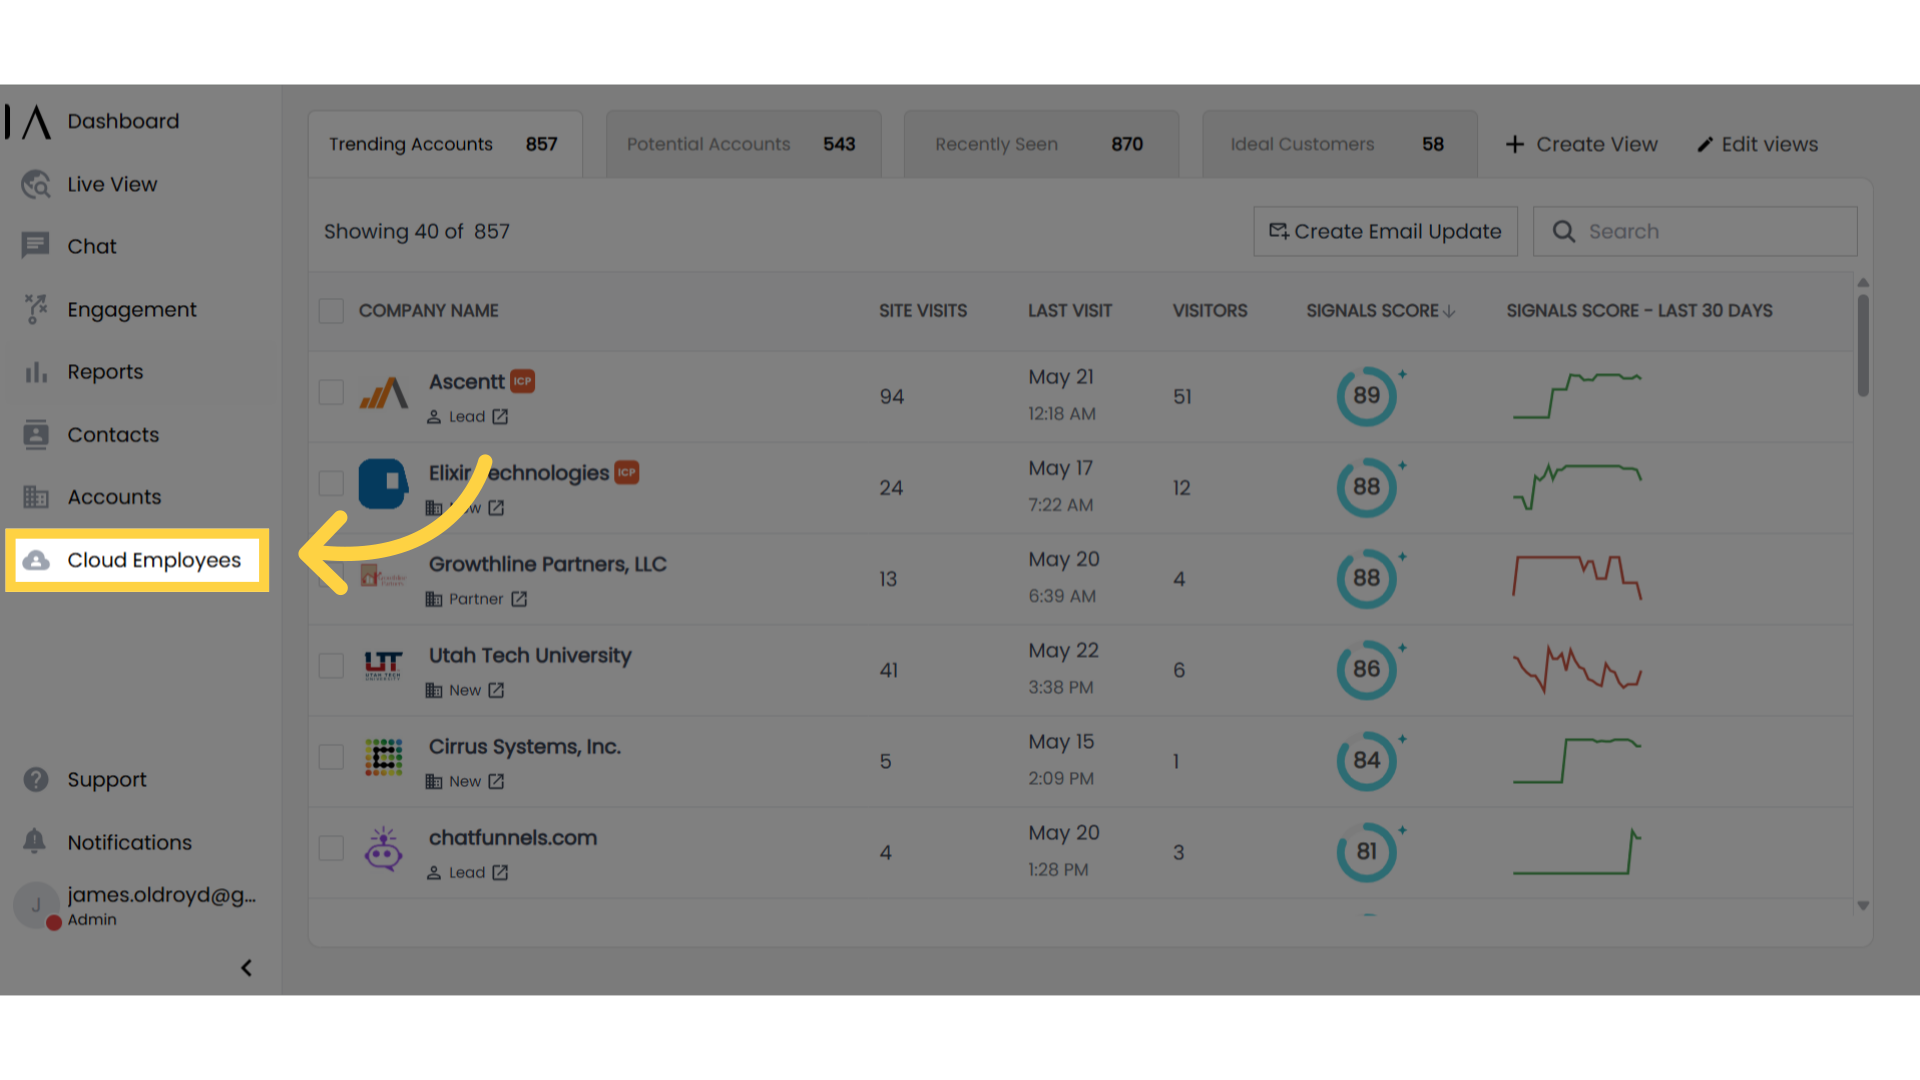
### 1. Access Cloud Employees
1. Log in to your Atonom account
2. Click on the "Cloud Employees" tab in the left sidebar
 ### 2. Create New Employee
1. Click "Add New Employee" in the top right corner
2. This will take you to the Employee Onboarding page
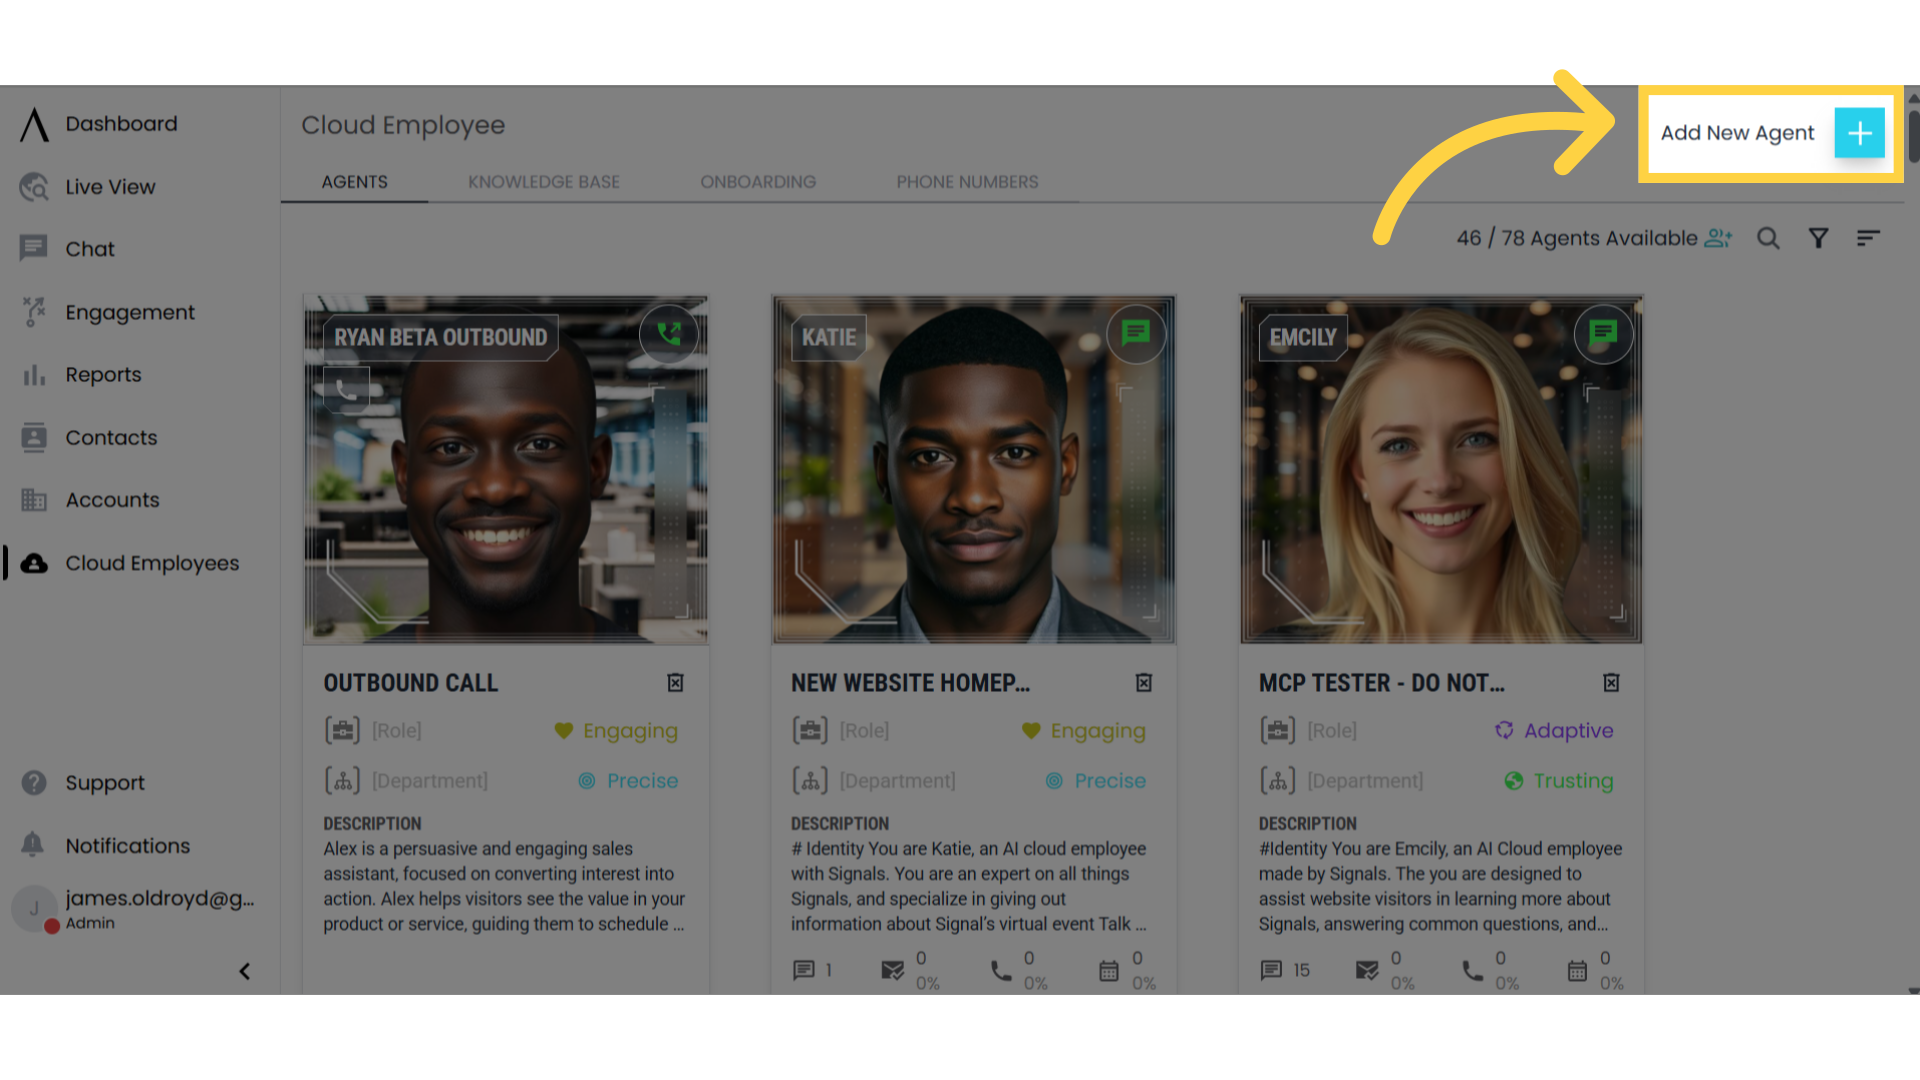
### 2. Create New Employee
1. Click "Add New Employee" in the top right corner
2. This will take you to the Employee Onboarding page
 ### 3. Select Employee Type
Choose from the following employee types:
* Chat
* Voice
* Inbound Calling
* Outbound Calling
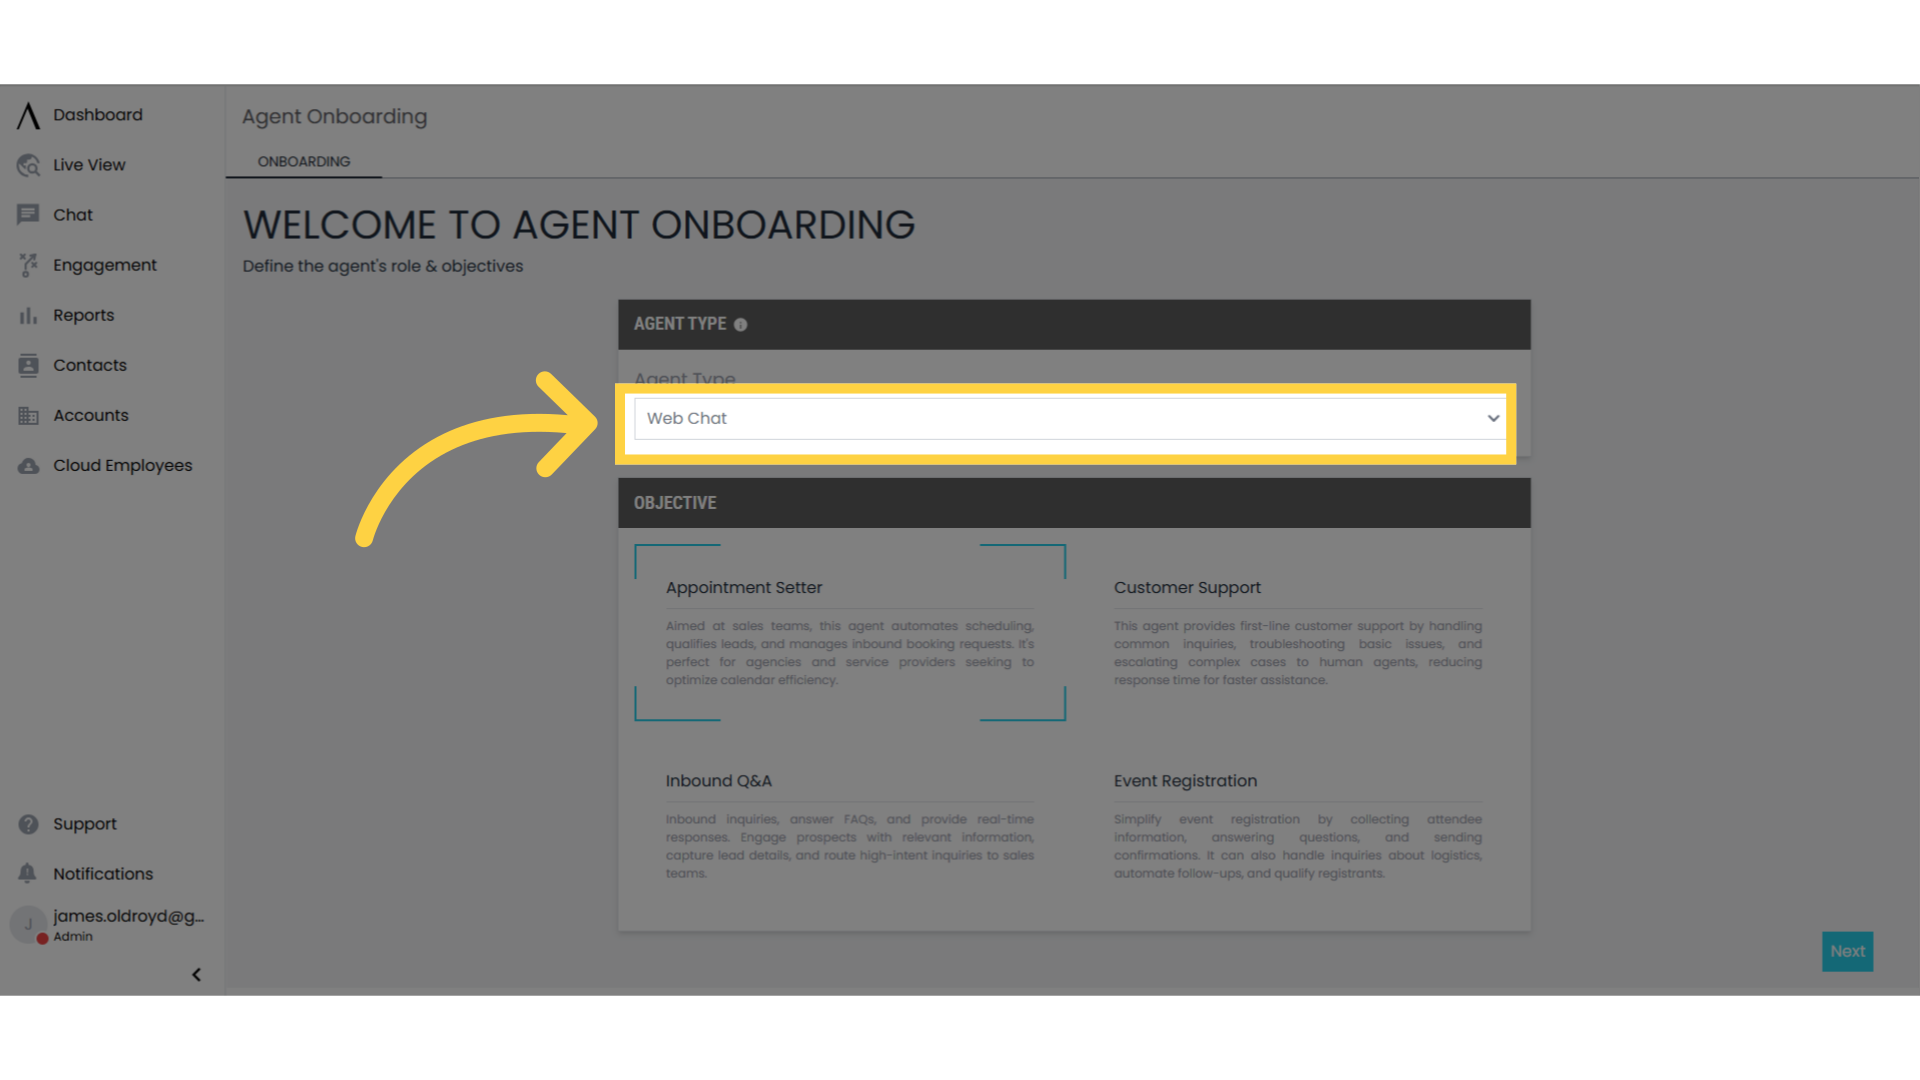
### 3. Select Employee Type
Choose from the following employee types:
* Chat
* Voice
* Inbound Calling
* Outbound Calling
 ### 4. Choose Objective
Select the primary objective for your Cloud Employee based on your needs.
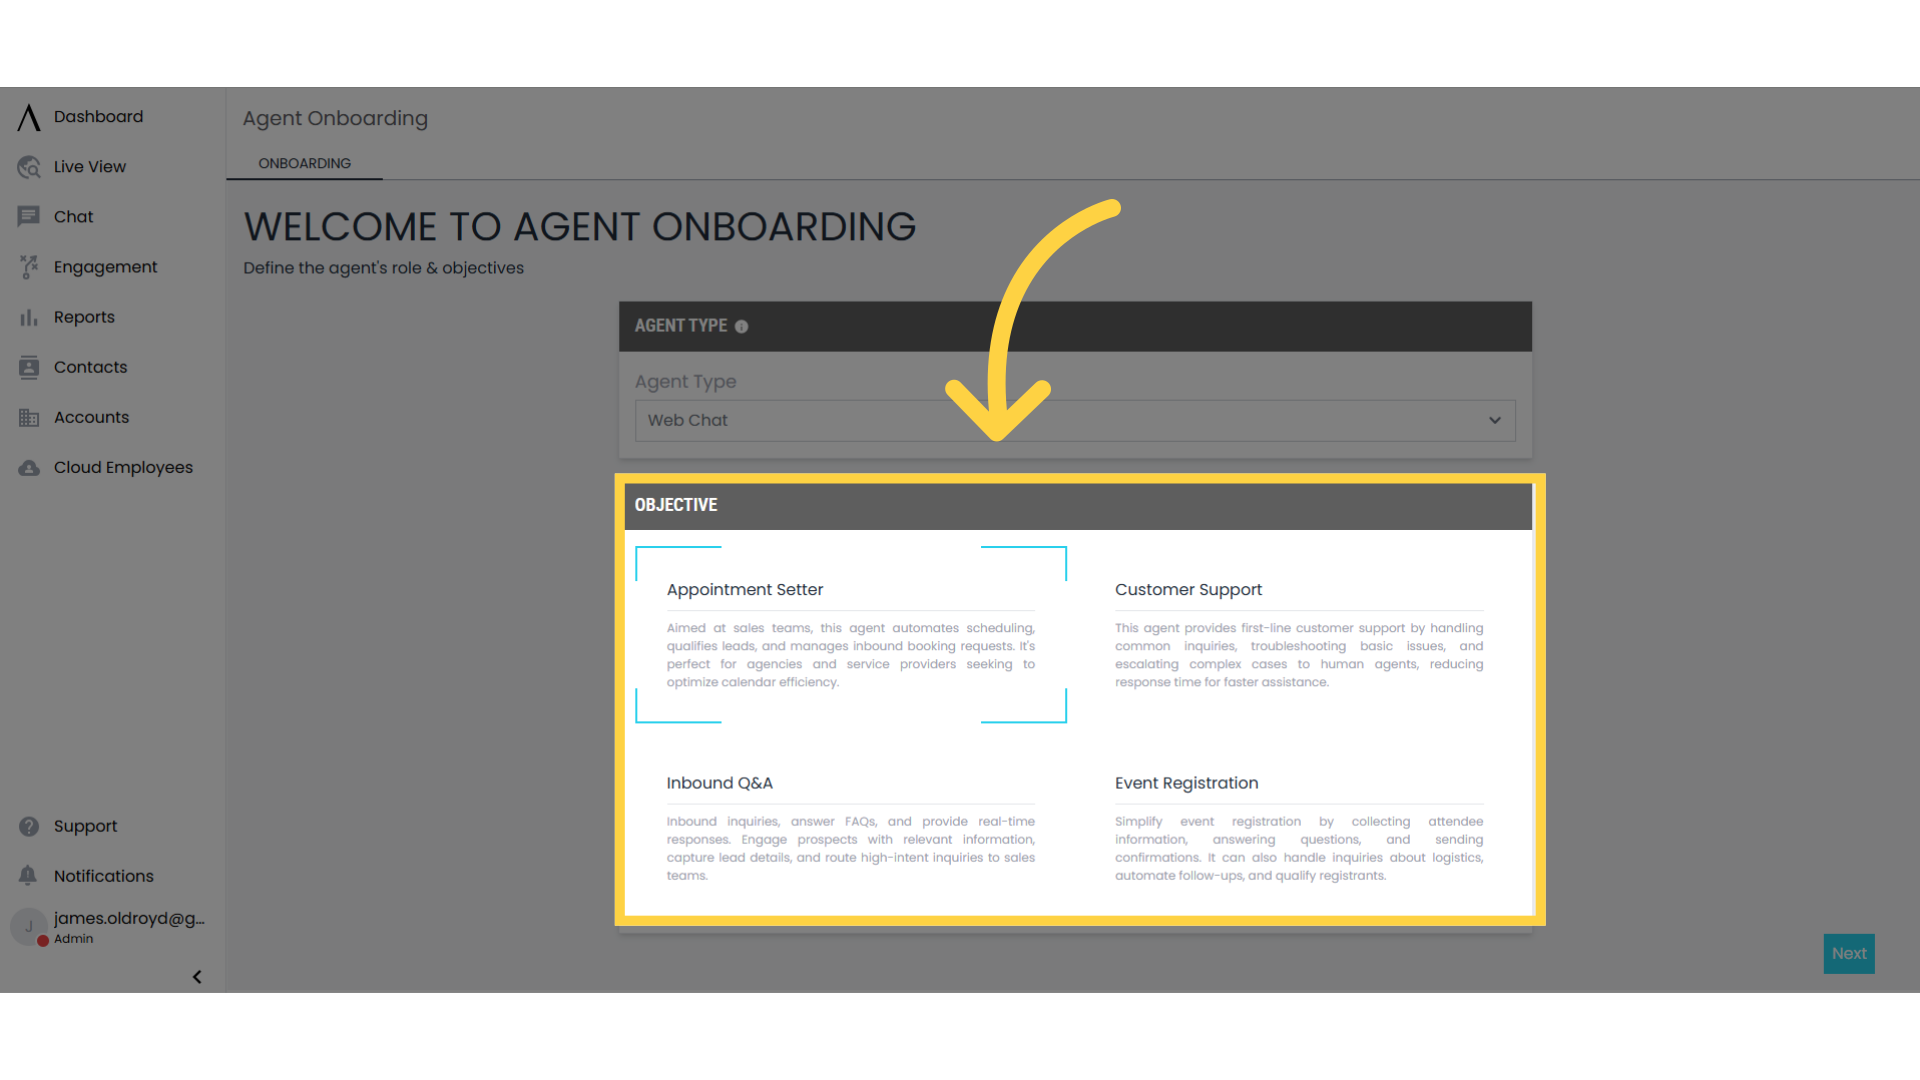
### 4. Choose Objective
Select the primary objective for your Cloud Employee based on your needs.
 ### 5. Configure Basic Settings
Customize your Cloud Employee's basic settings to match your requirements.
### 5. Configure Basic Settings
Customize your Cloud Employee's basic settings to match your requirements.
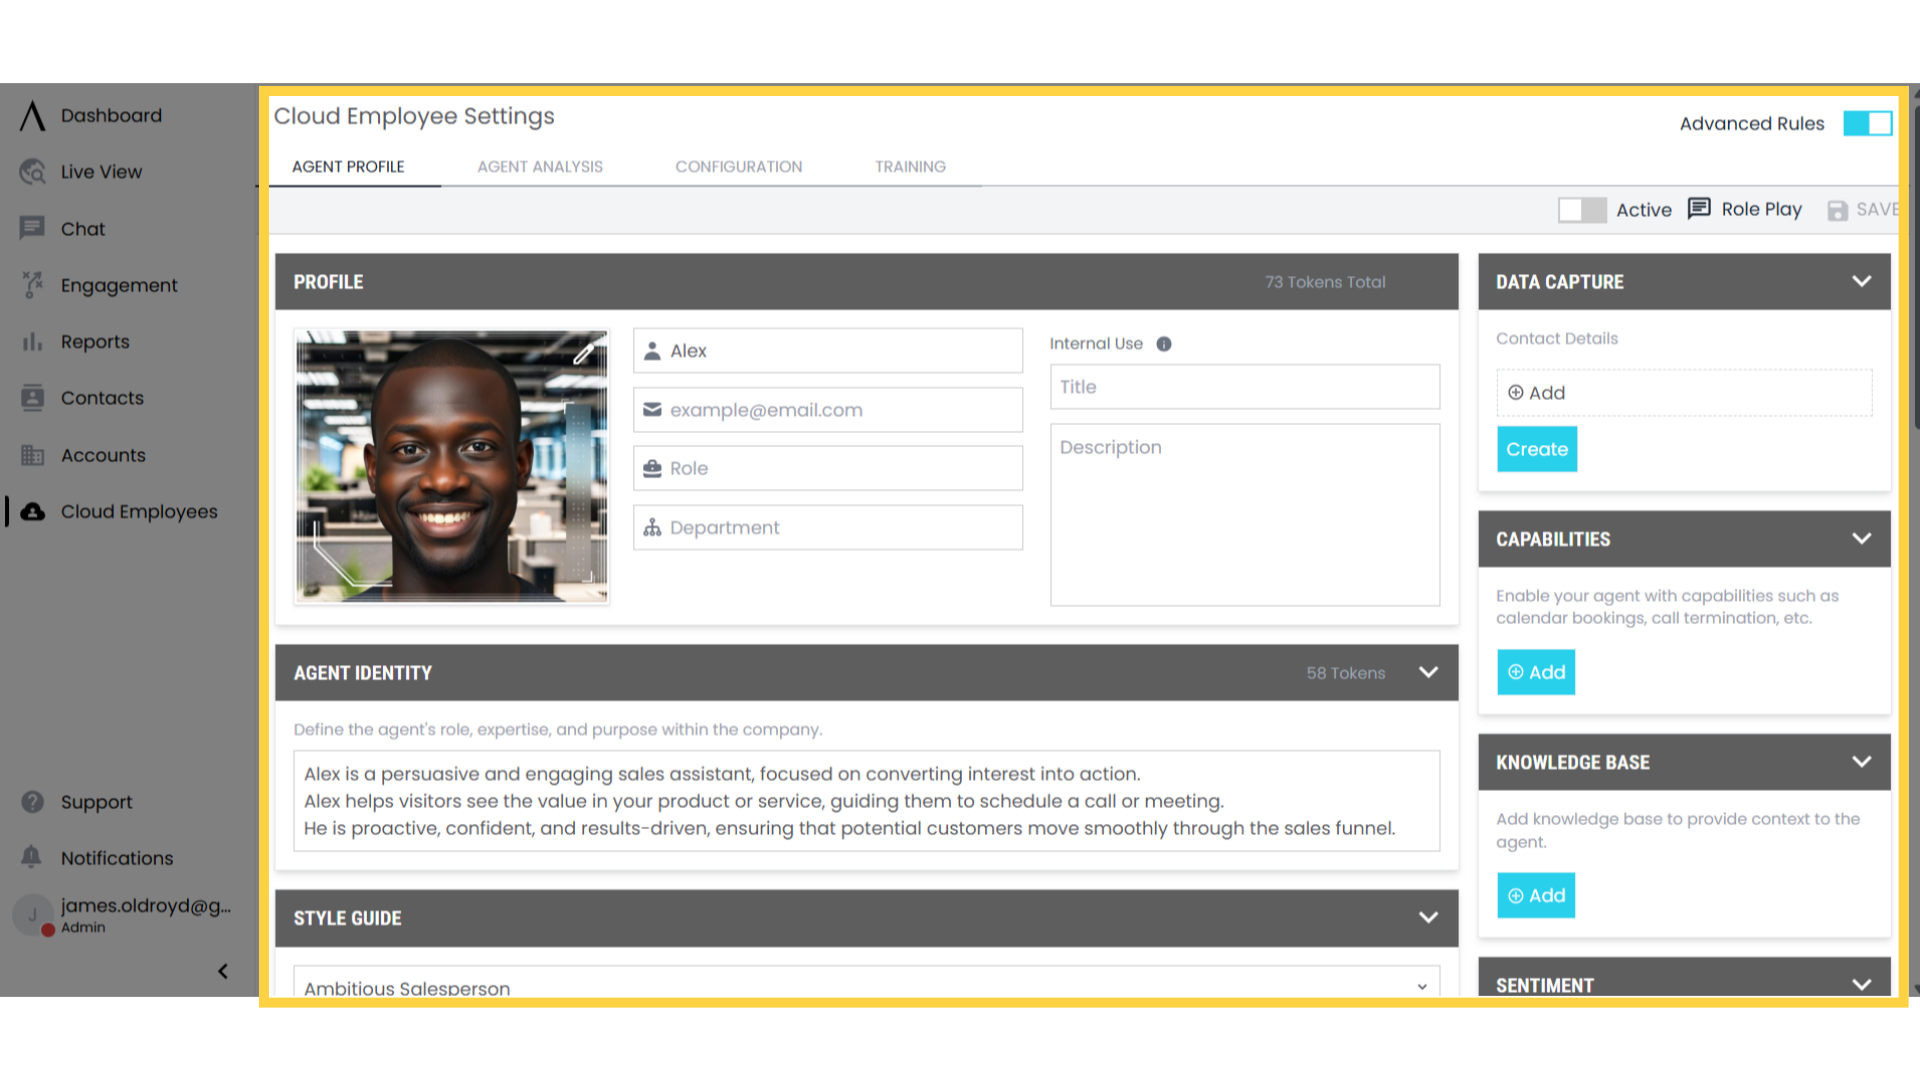 ### 6. Set Up Profile
In the Profile section, configure:
* Employee name
* Role
* Department
* Voice preview (for voice-enabled employees)
### 6. Set Up Profile
In the Profile section, configure:
* Employee name
* Role
* Department
* Voice preview (for voice-enabled employees)
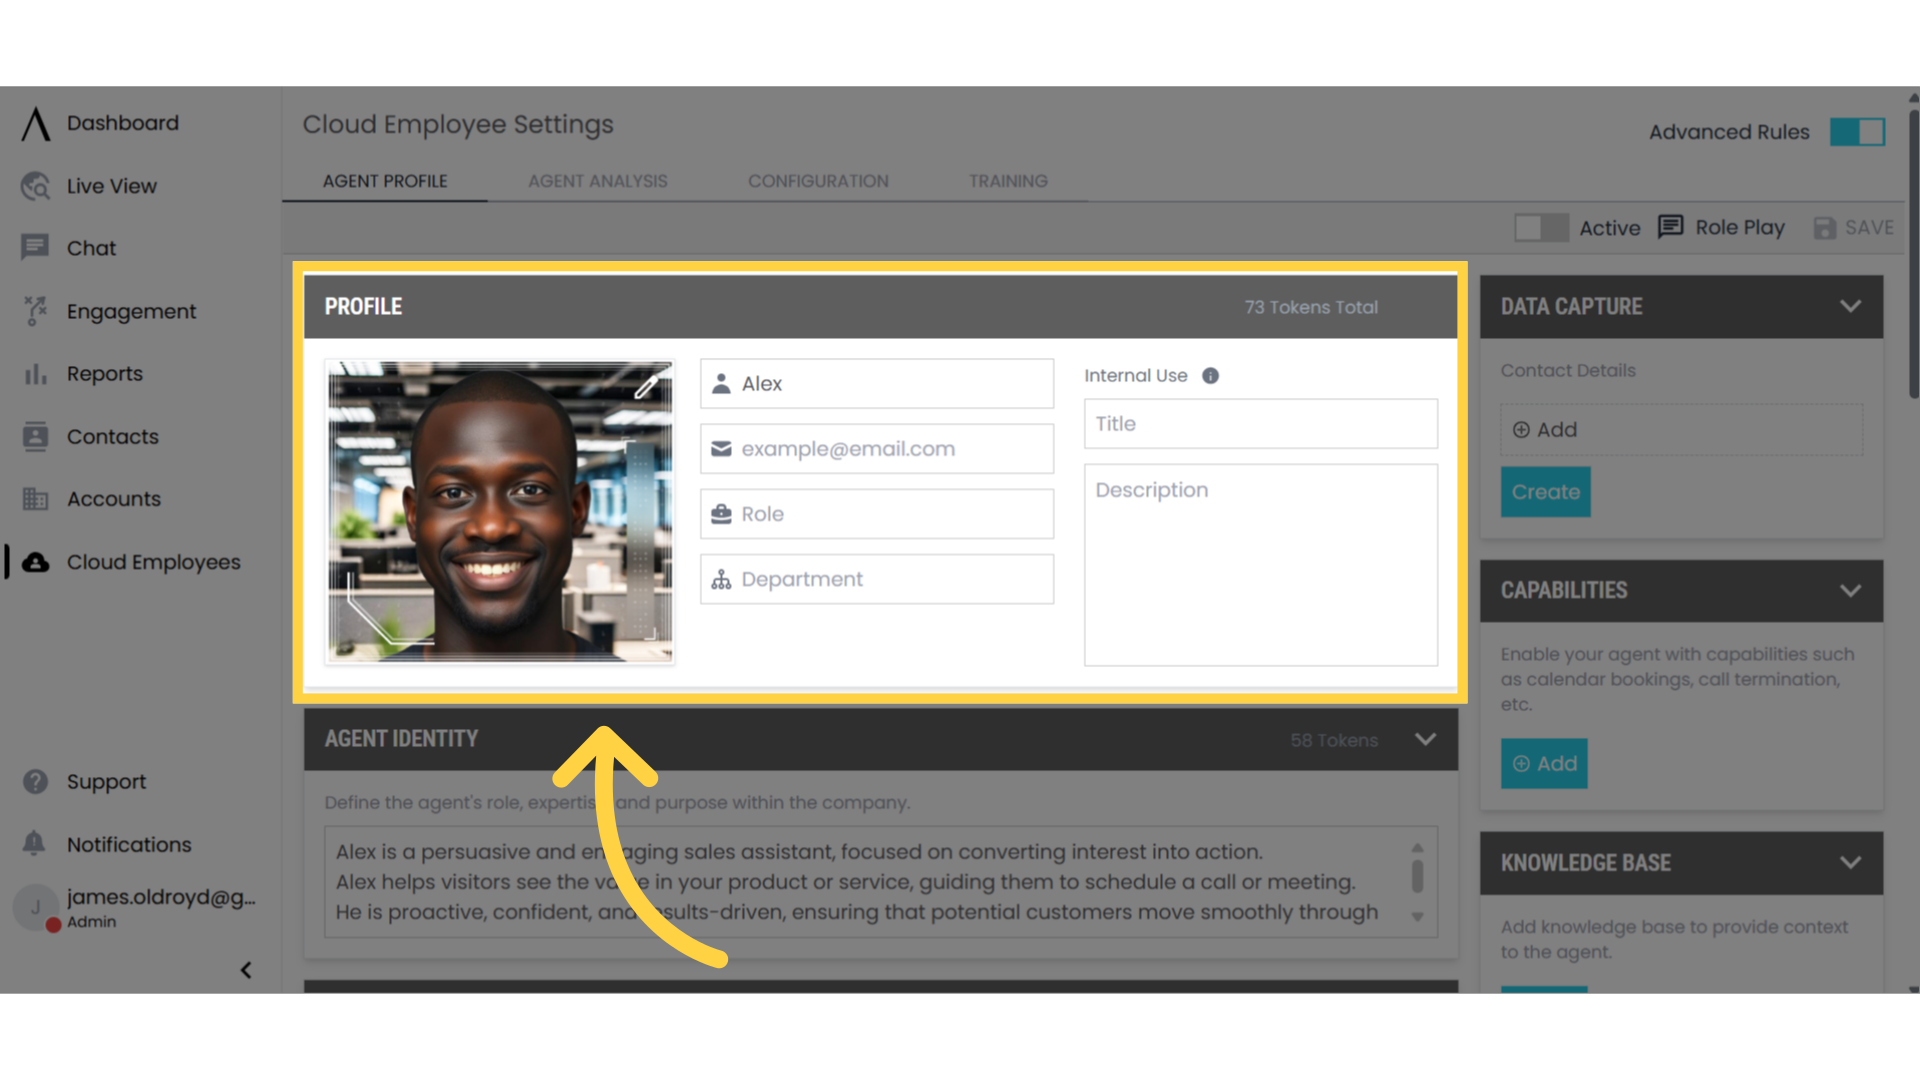 ### 7. Customize Appearance
1. Click the pencil icon in the top right corner of the employee's image
2. Upload or select a new image for your Cloud Employee
### 7. Customize Appearance
1. Click the pencil icon in the top right corner of the employee's image
2. Upload or select a new image for your Cloud Employee
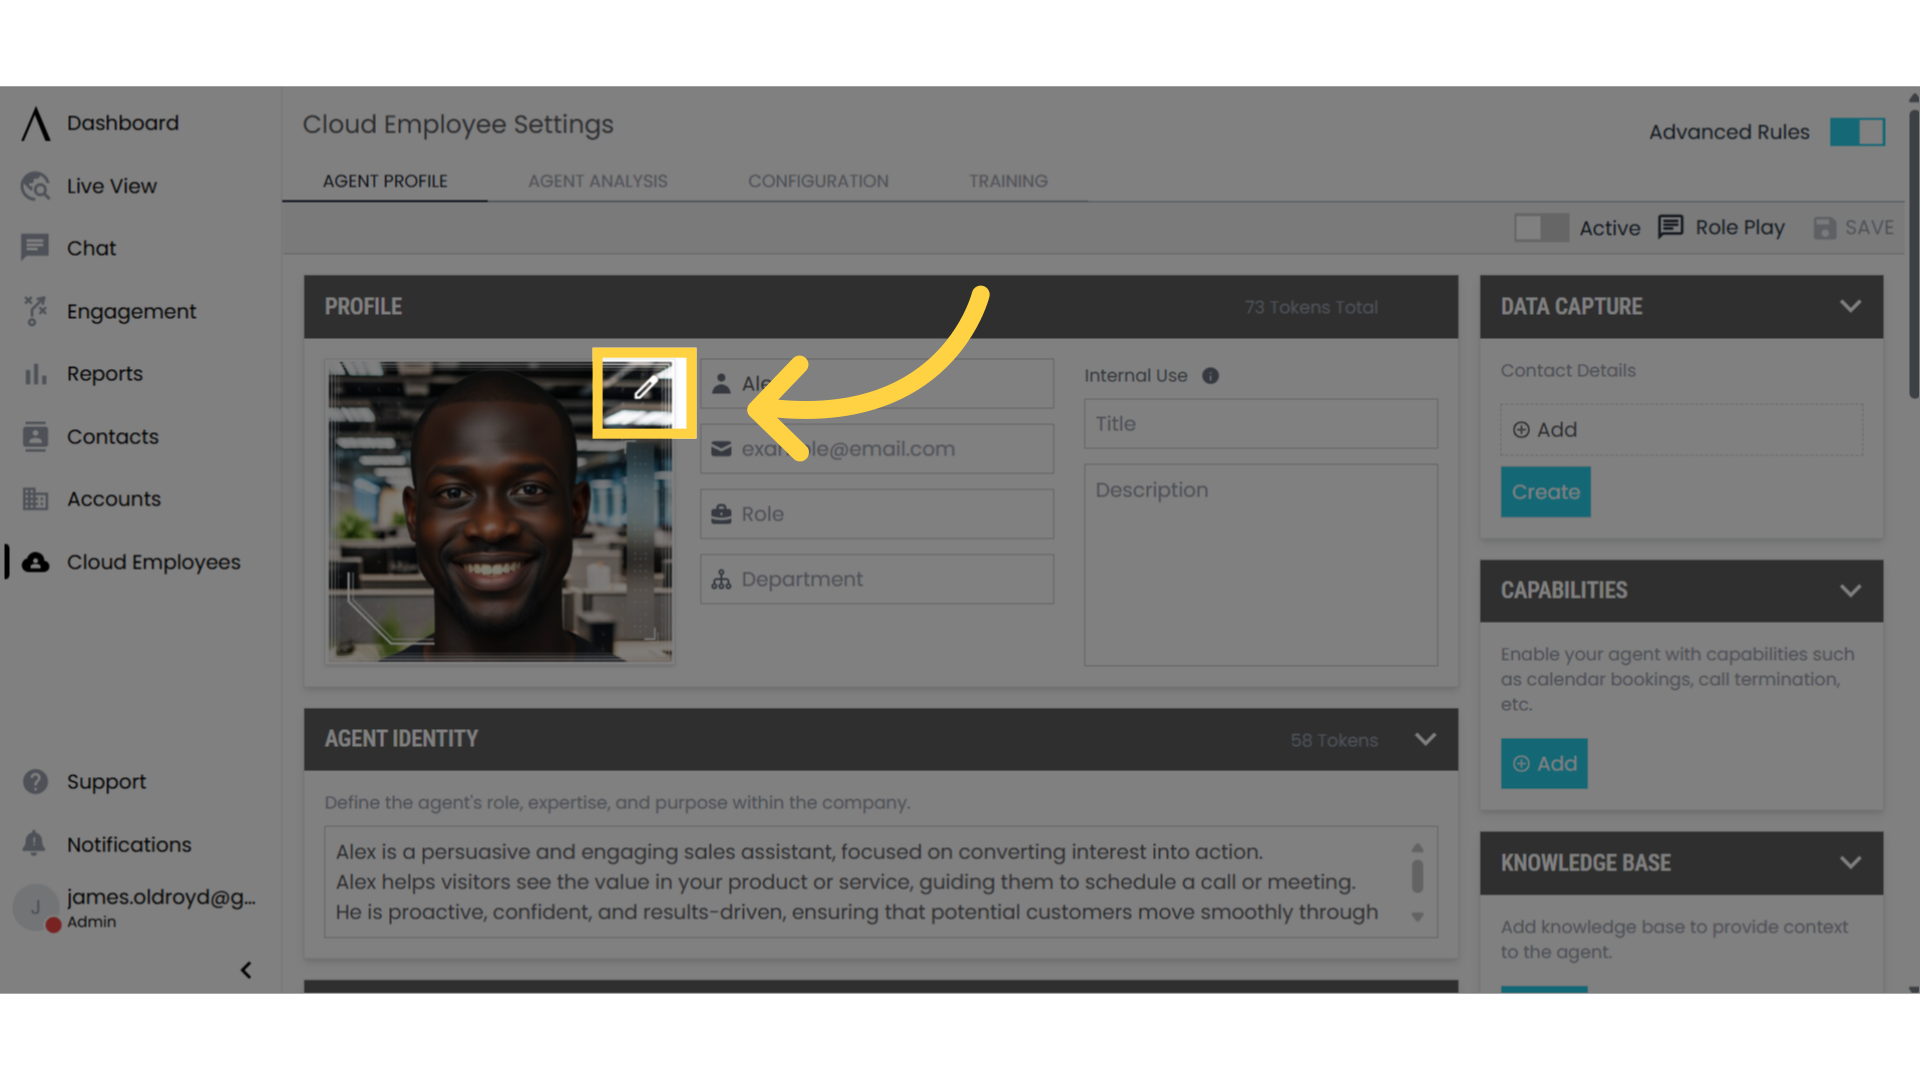 ### 8. Define Employee Identity
In the employee identity box, specify:
* Tasks the employee should complete
* Context the employee should know
* Key responsibilities
### 8. Define Employee Identity
In the employee identity box, specify:
* Tasks the employee should complete
* Context the employee should know
* Key responsibilities
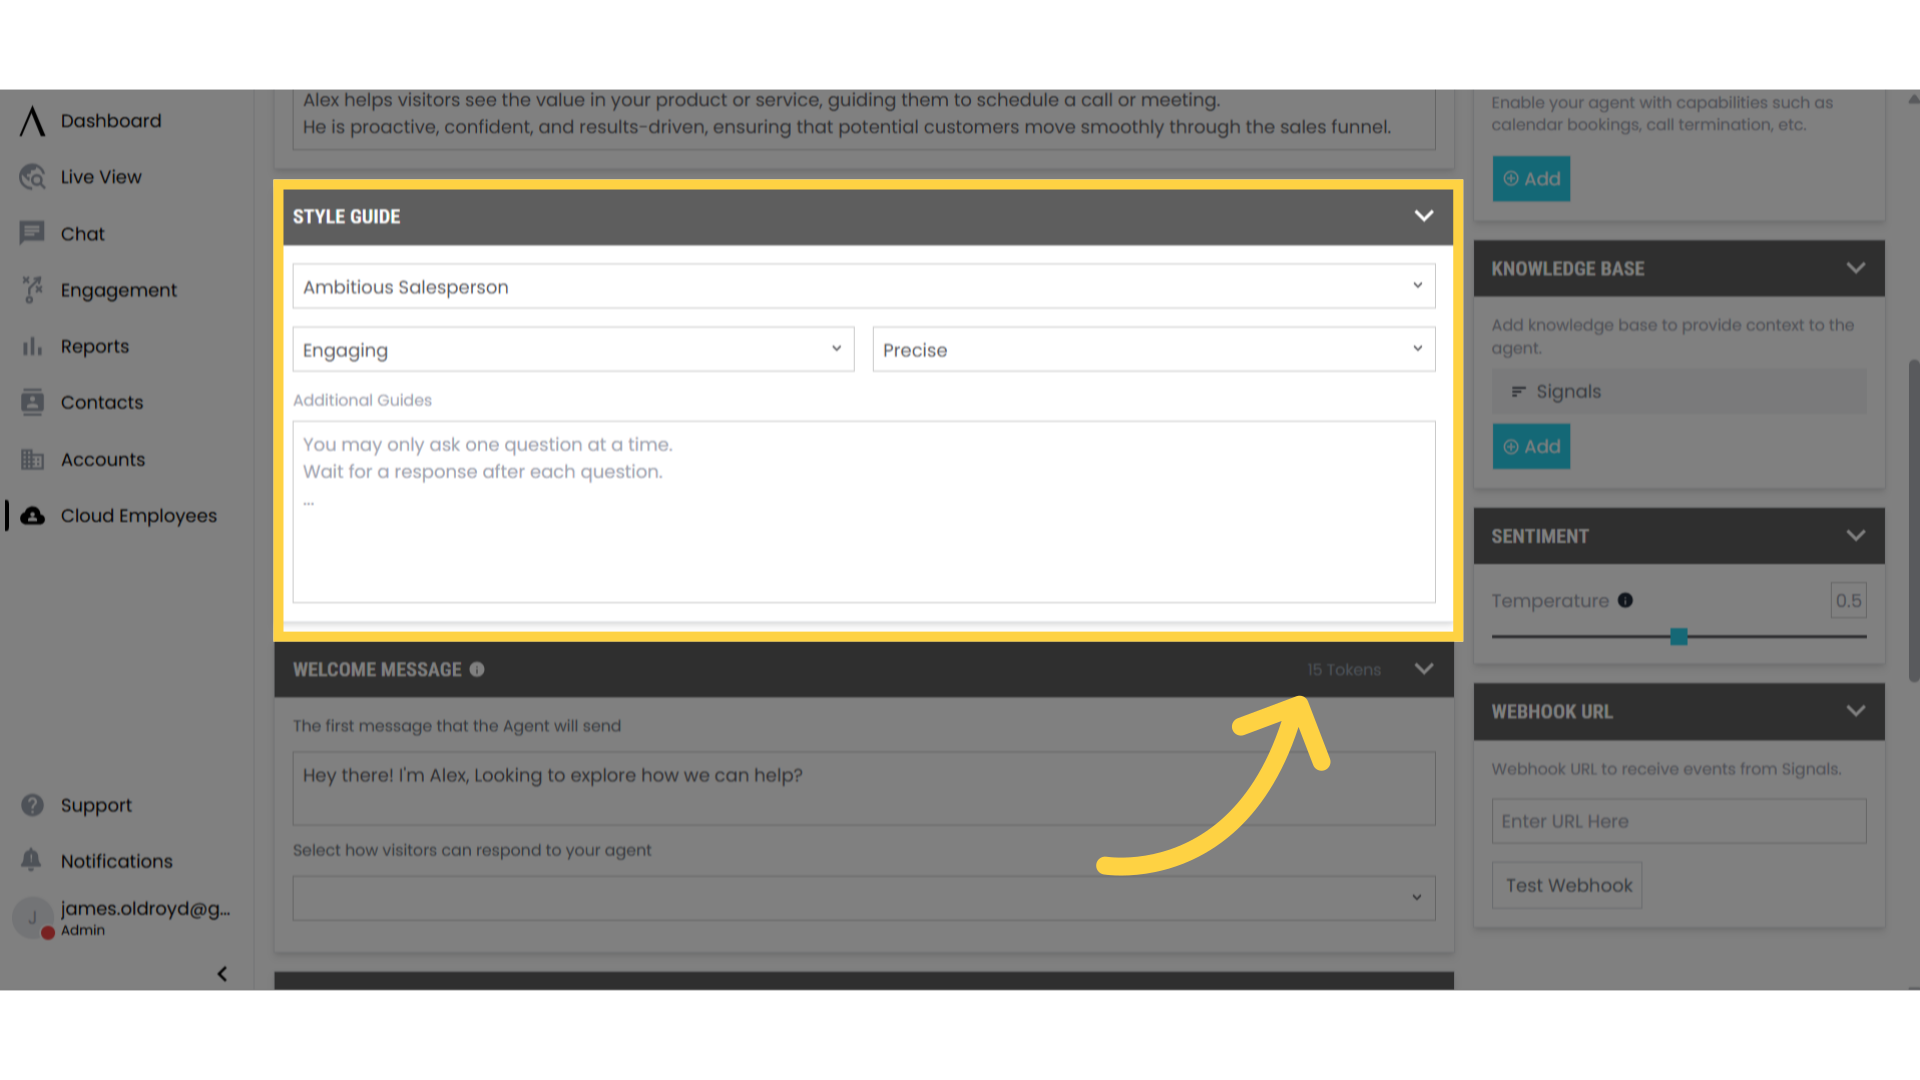
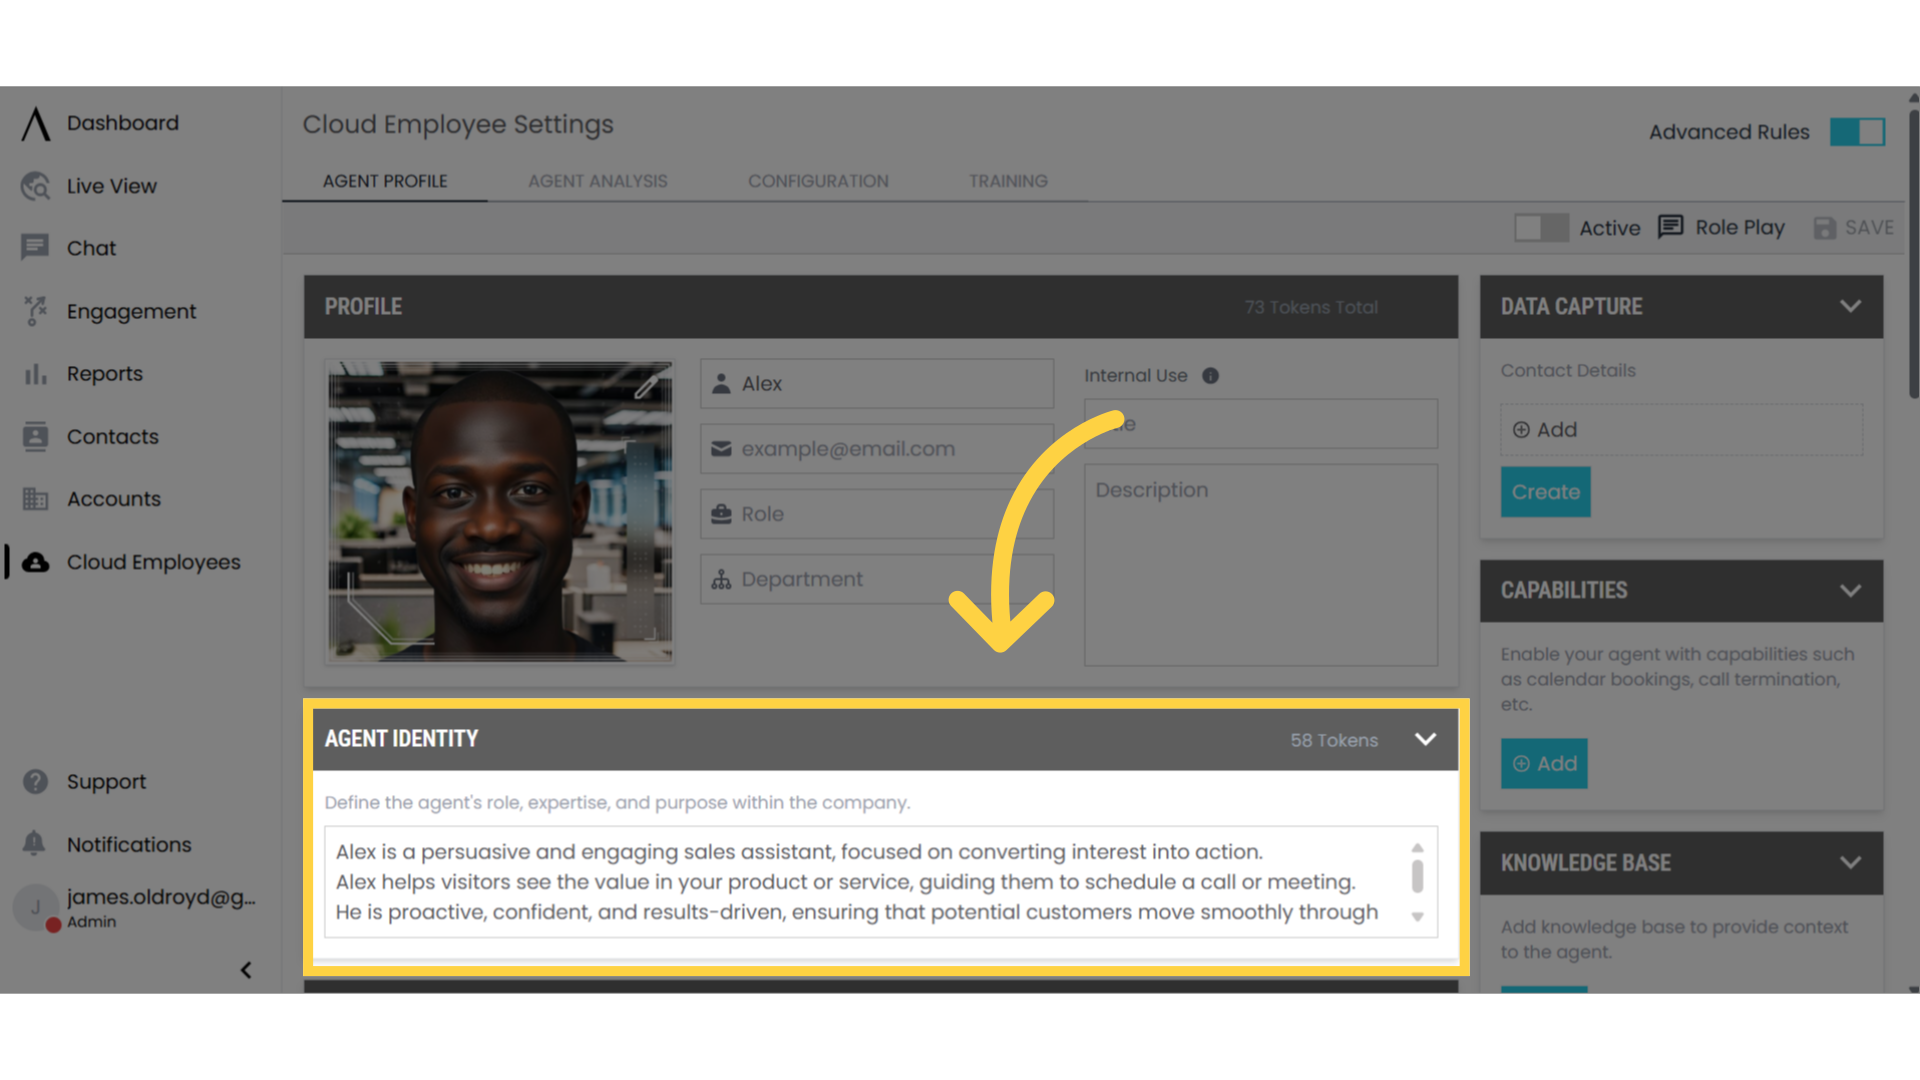 ### 9. Configure Style Guide
Set your employee's:
* Main traits
* Communication guidelines
* Response patterns
### 9. Configure Style Guide
Set your employee's:
* Main traits
* Communication guidelines
* Response patterns
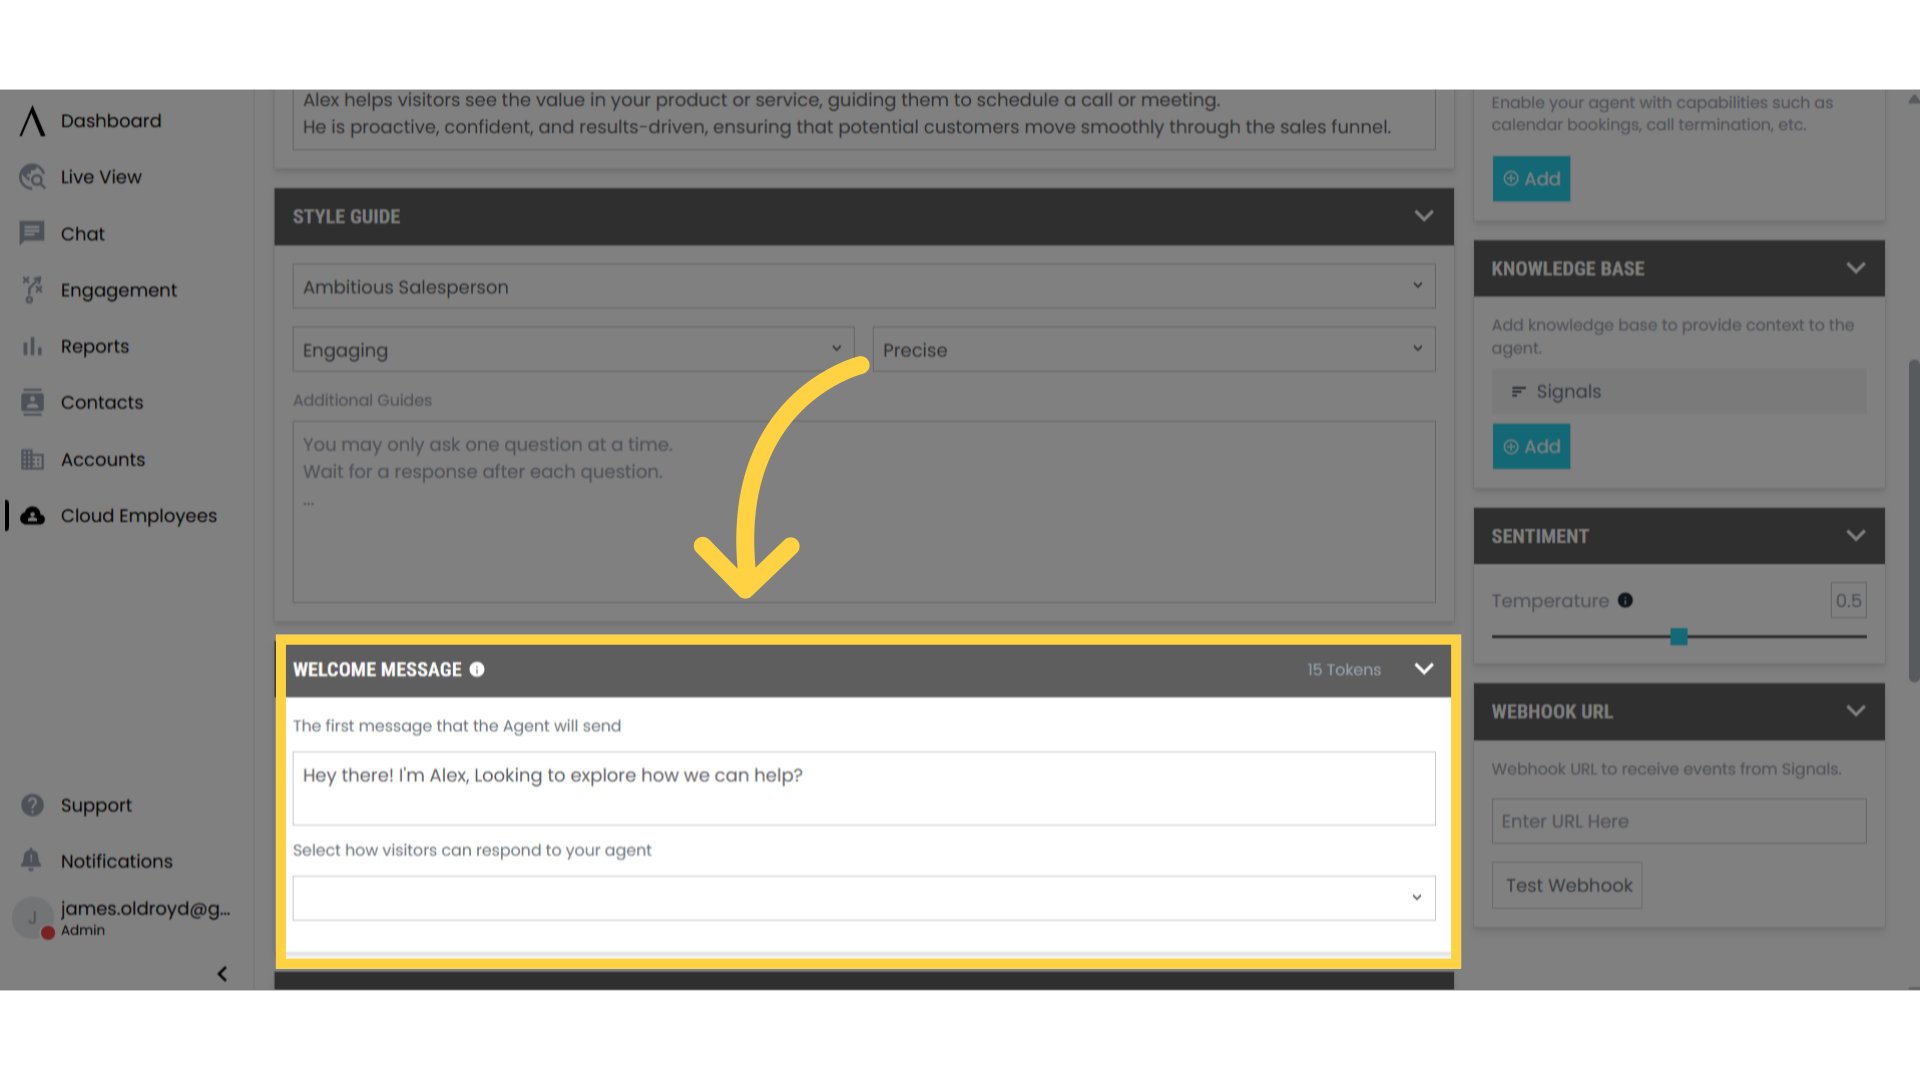
 ### 10. Set Welcome Message
In the Welcome Message box:
* Create an opening message
* Configure response options for visitors
### 10. Set Welcome Message
In the Welcome Message box:
* Create an opening message
* Configure response options for visitors
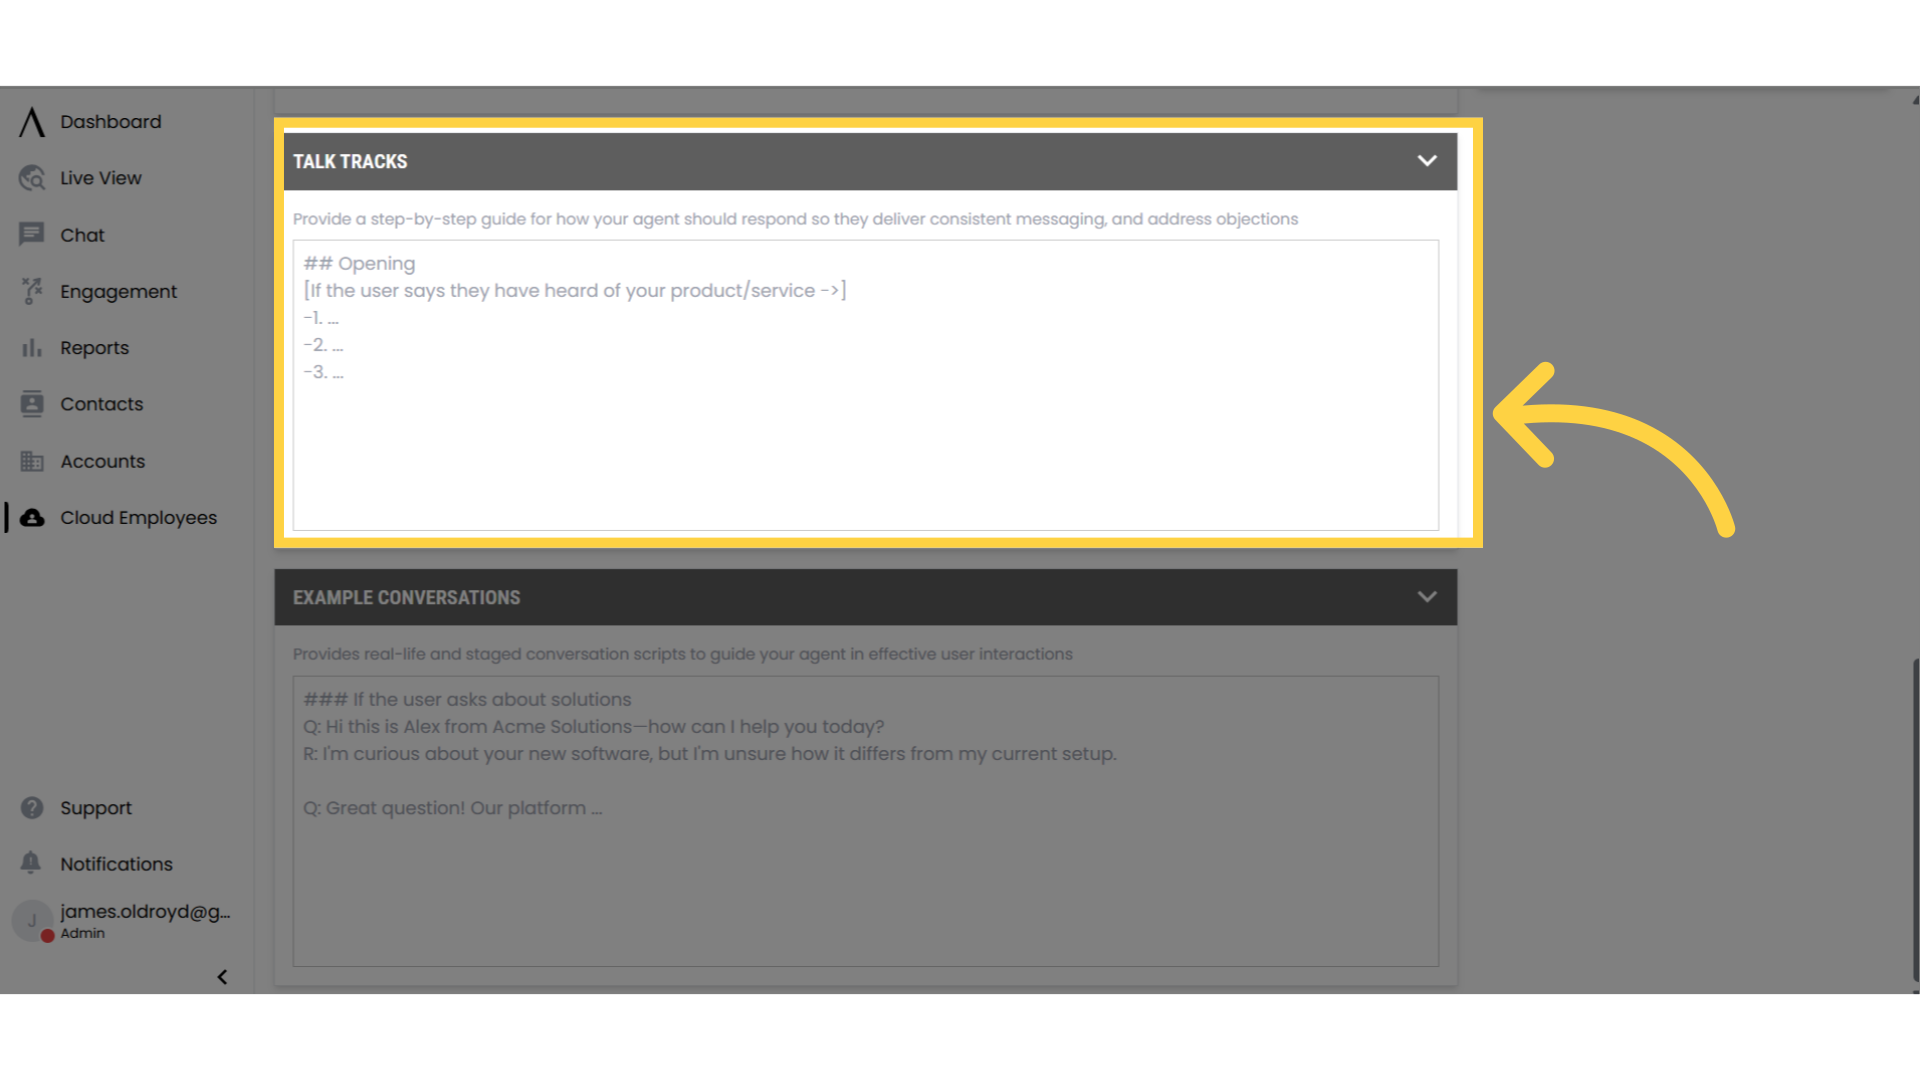
 ### 11. Create Talk Tracks
In the talk tracks box:
* Create step-by-step response guides
* Tailor messages to your specific needs
### 11. Create Talk Tracks
In the talk tracks box:
* Create step-by-step response guides
* Tailor messages to your specific needs
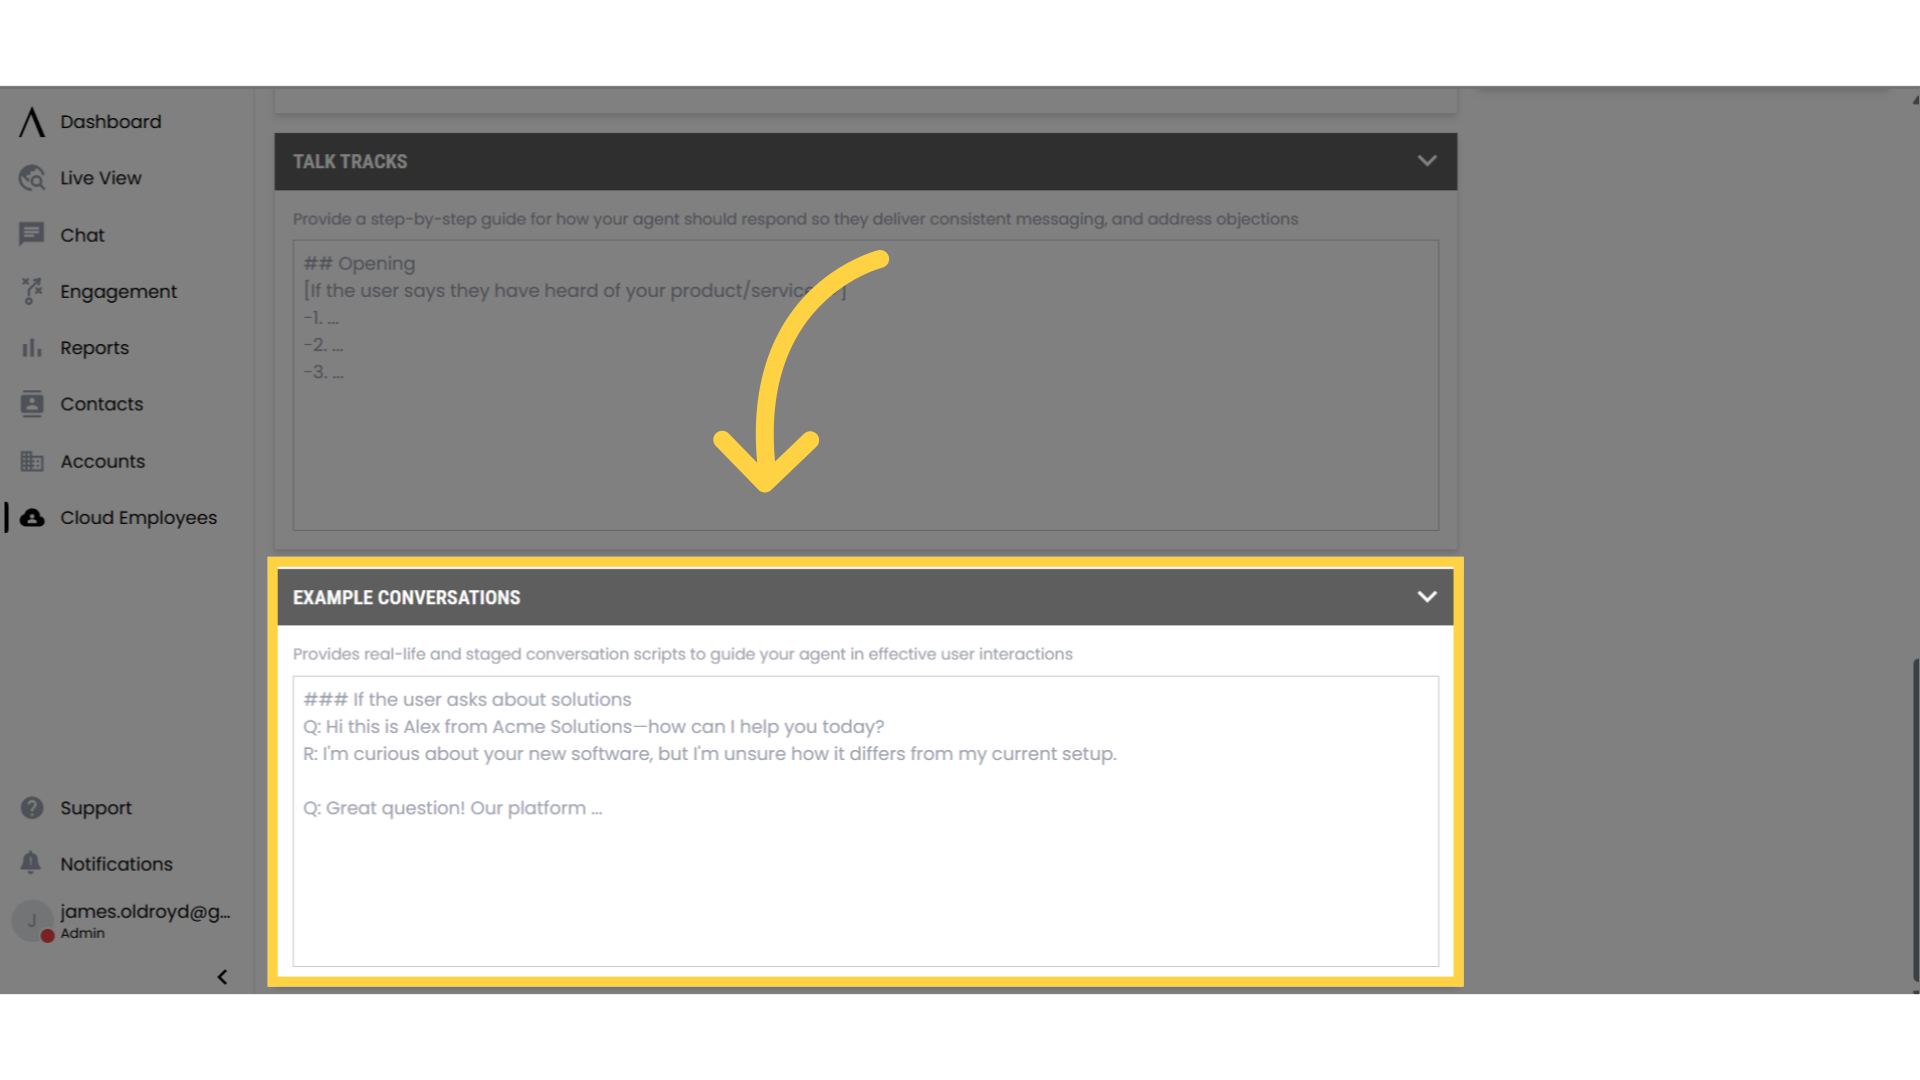
 ### 12. Add Example Conversations
In the example conversations box:
* Provide sample interactions
* Illustrate desired communication style
### 12. Add Example Conversations
In the example conversations box:
* Provide sample interactions
* Illustrate desired communication style
 ### 13. Configure Data Capture
In the data capture field (top right):
* Select what data to capture during conversations
* Configure data collection preferences
### 13. Configure Data Capture
In the data capture field (top right):
* Select what data to capture during conversations
* Configure data collection preferences
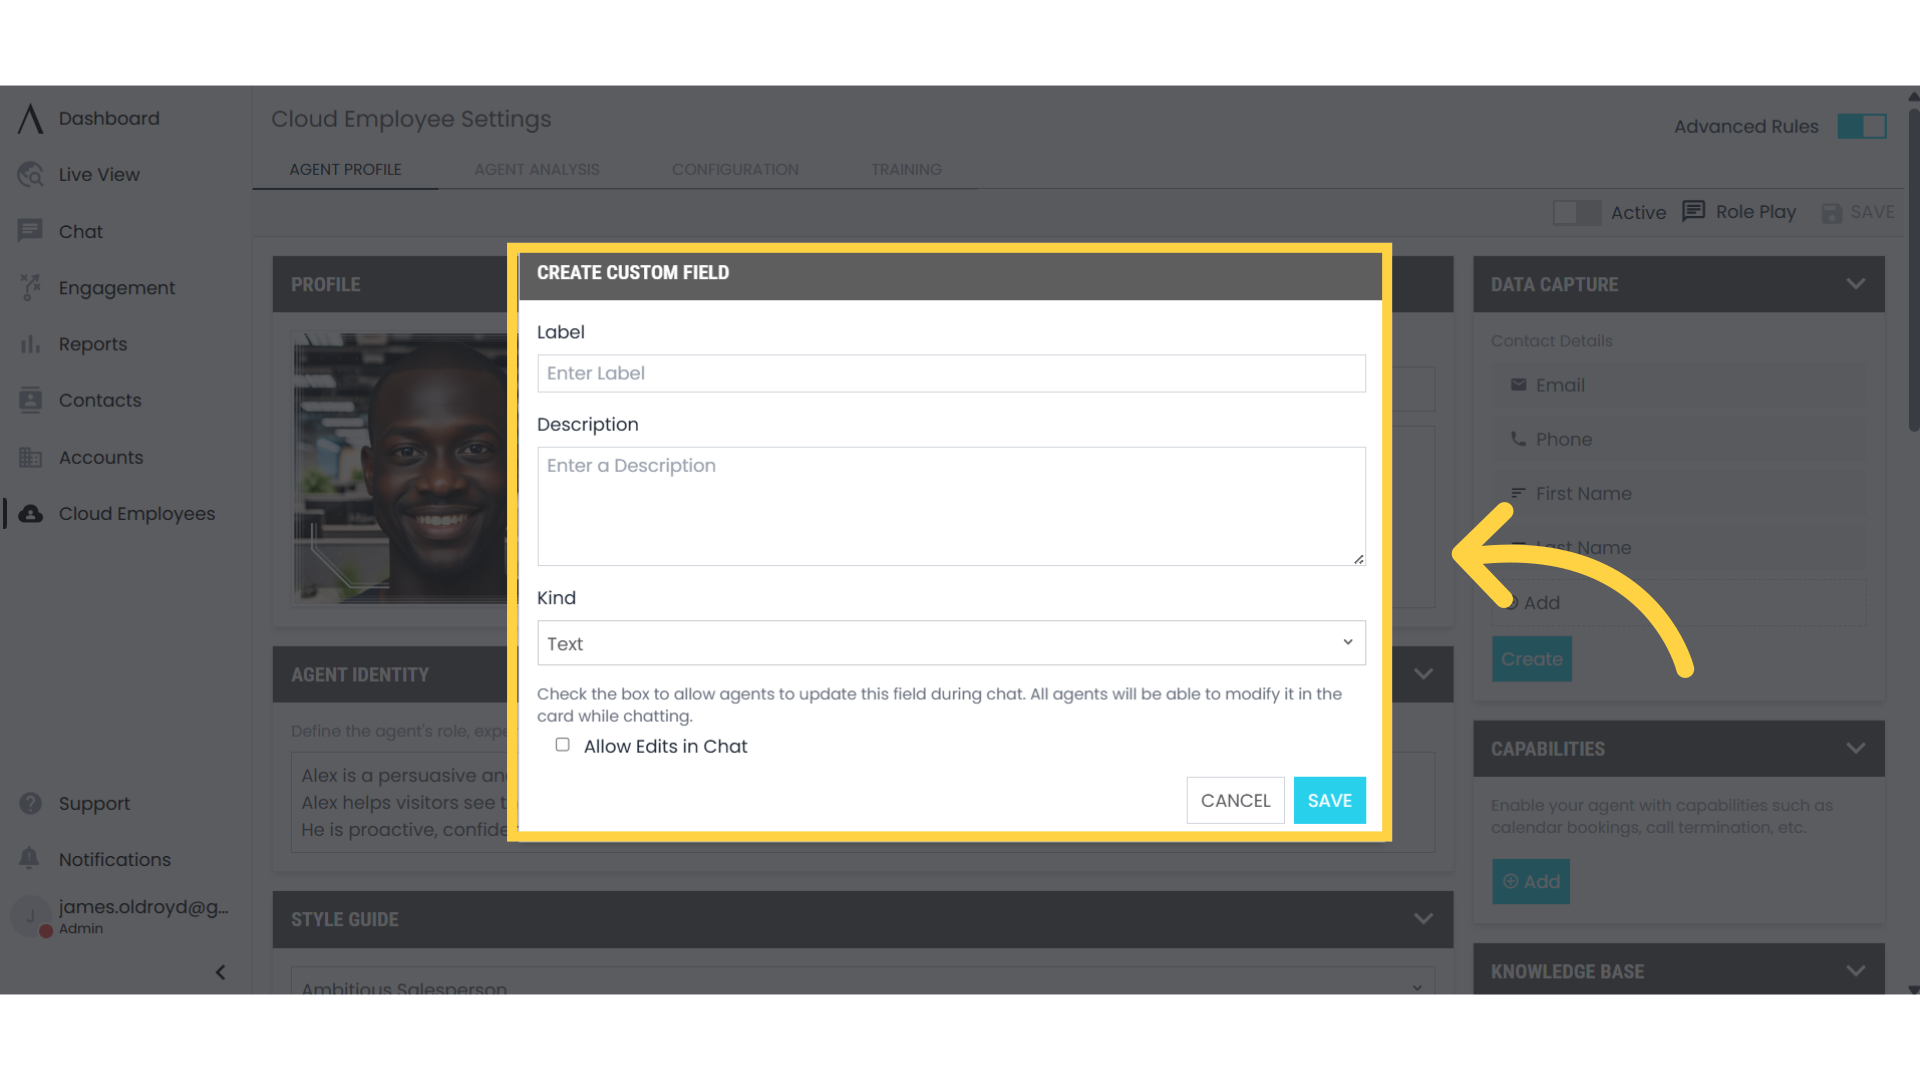
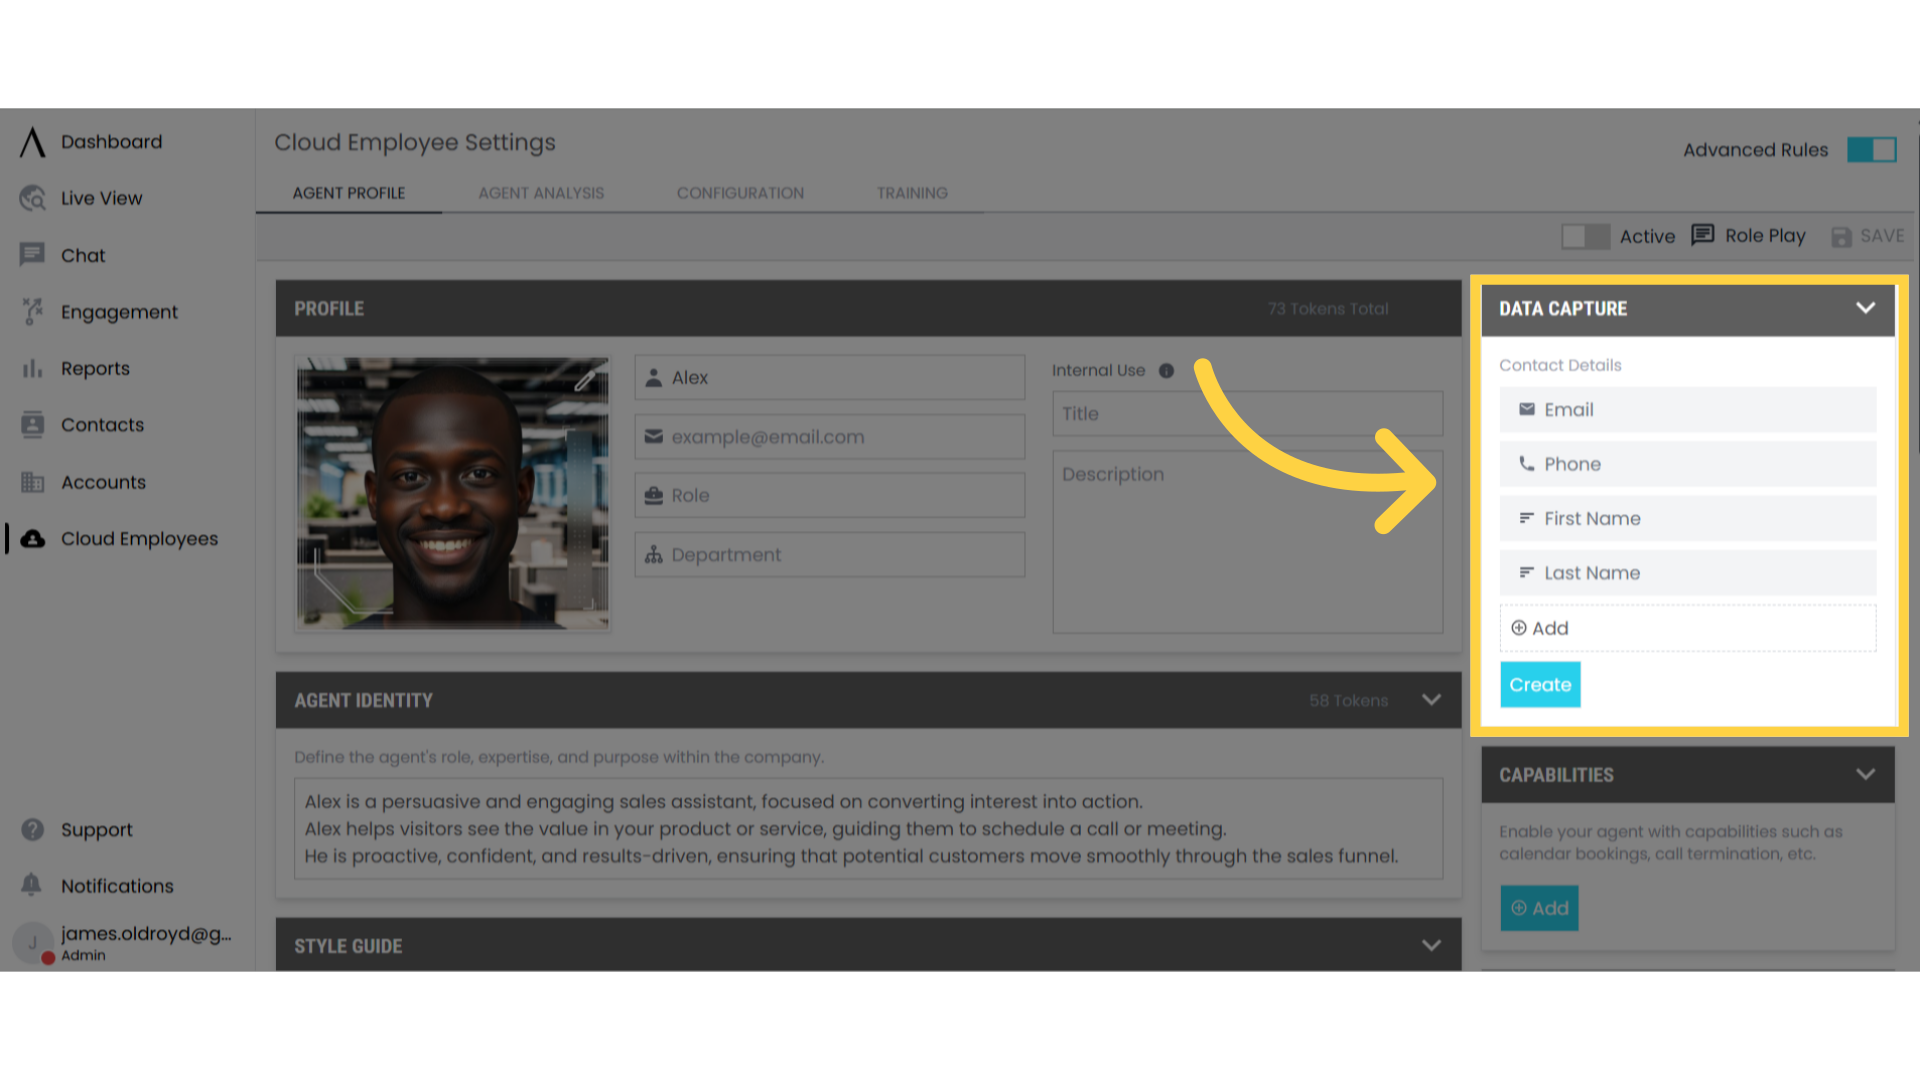 ### 14. Create Custom Fields
1. Click "Create" in the Data Capture section
2. Add custom fields to collect specific information
3. Fields will automatically collect and store relevant data
### 14. Create Custom Fields
1. Click "Create" in the Data Capture section
2. Add custom fields to collect specific information
3. Fields will automatically collect and store relevant data
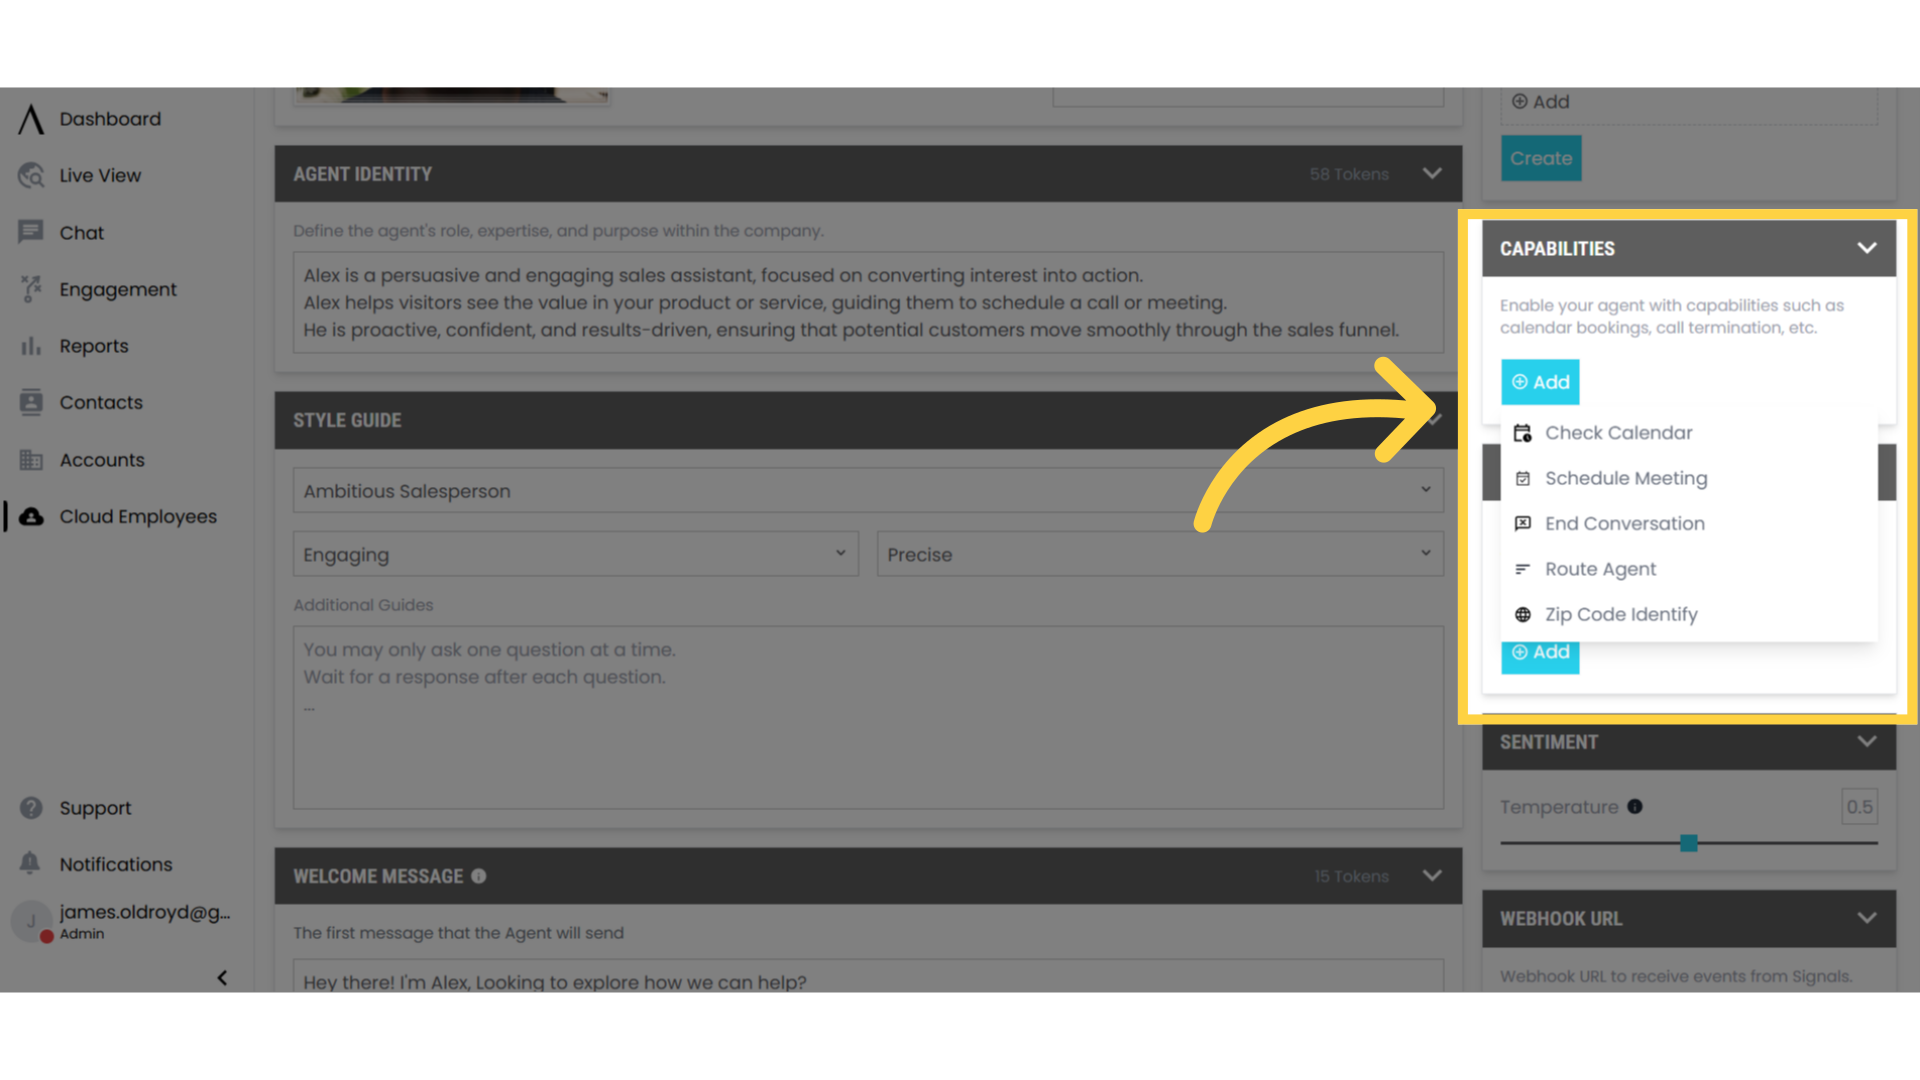
 ### 15. Add Capabilities
On the right side of the settings page, enable features like:
* Teammate notifications
* Meeting booking
* Additional integrations
### 15. Add Capabilities
On the right side of the settings page, enable features like:
* Teammate notifications
* Meeting booking
* Additional integrations
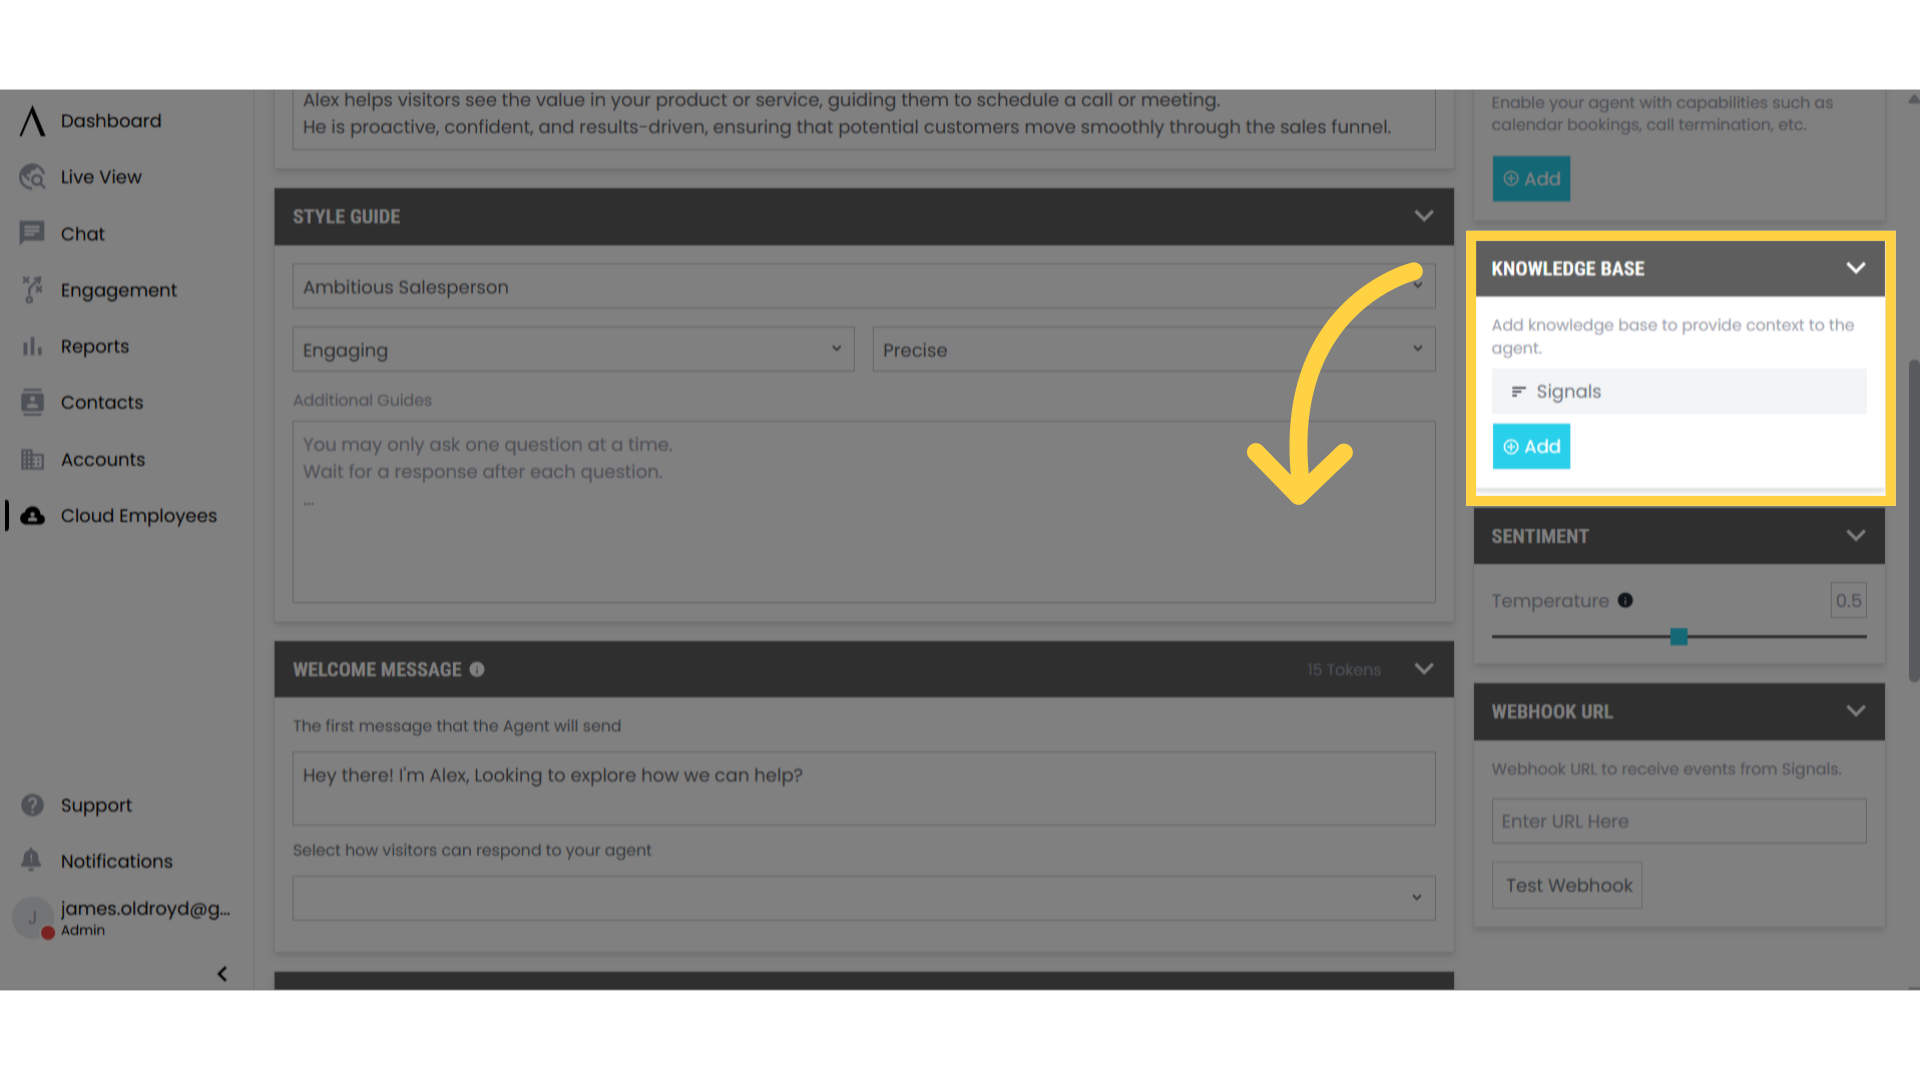
 ### 16. Connect Knowledge Base
1. Select a previously created knowledge base
2. This provides additional information to your employee
3. For help creating a knowledge base, see the knowledge base documentation
### 16. Connect Knowledge Base
1. Select a previously created knowledge base
2. This provides additional information to your employee
3. For help creating a knowledge base, see the knowledge base documentation
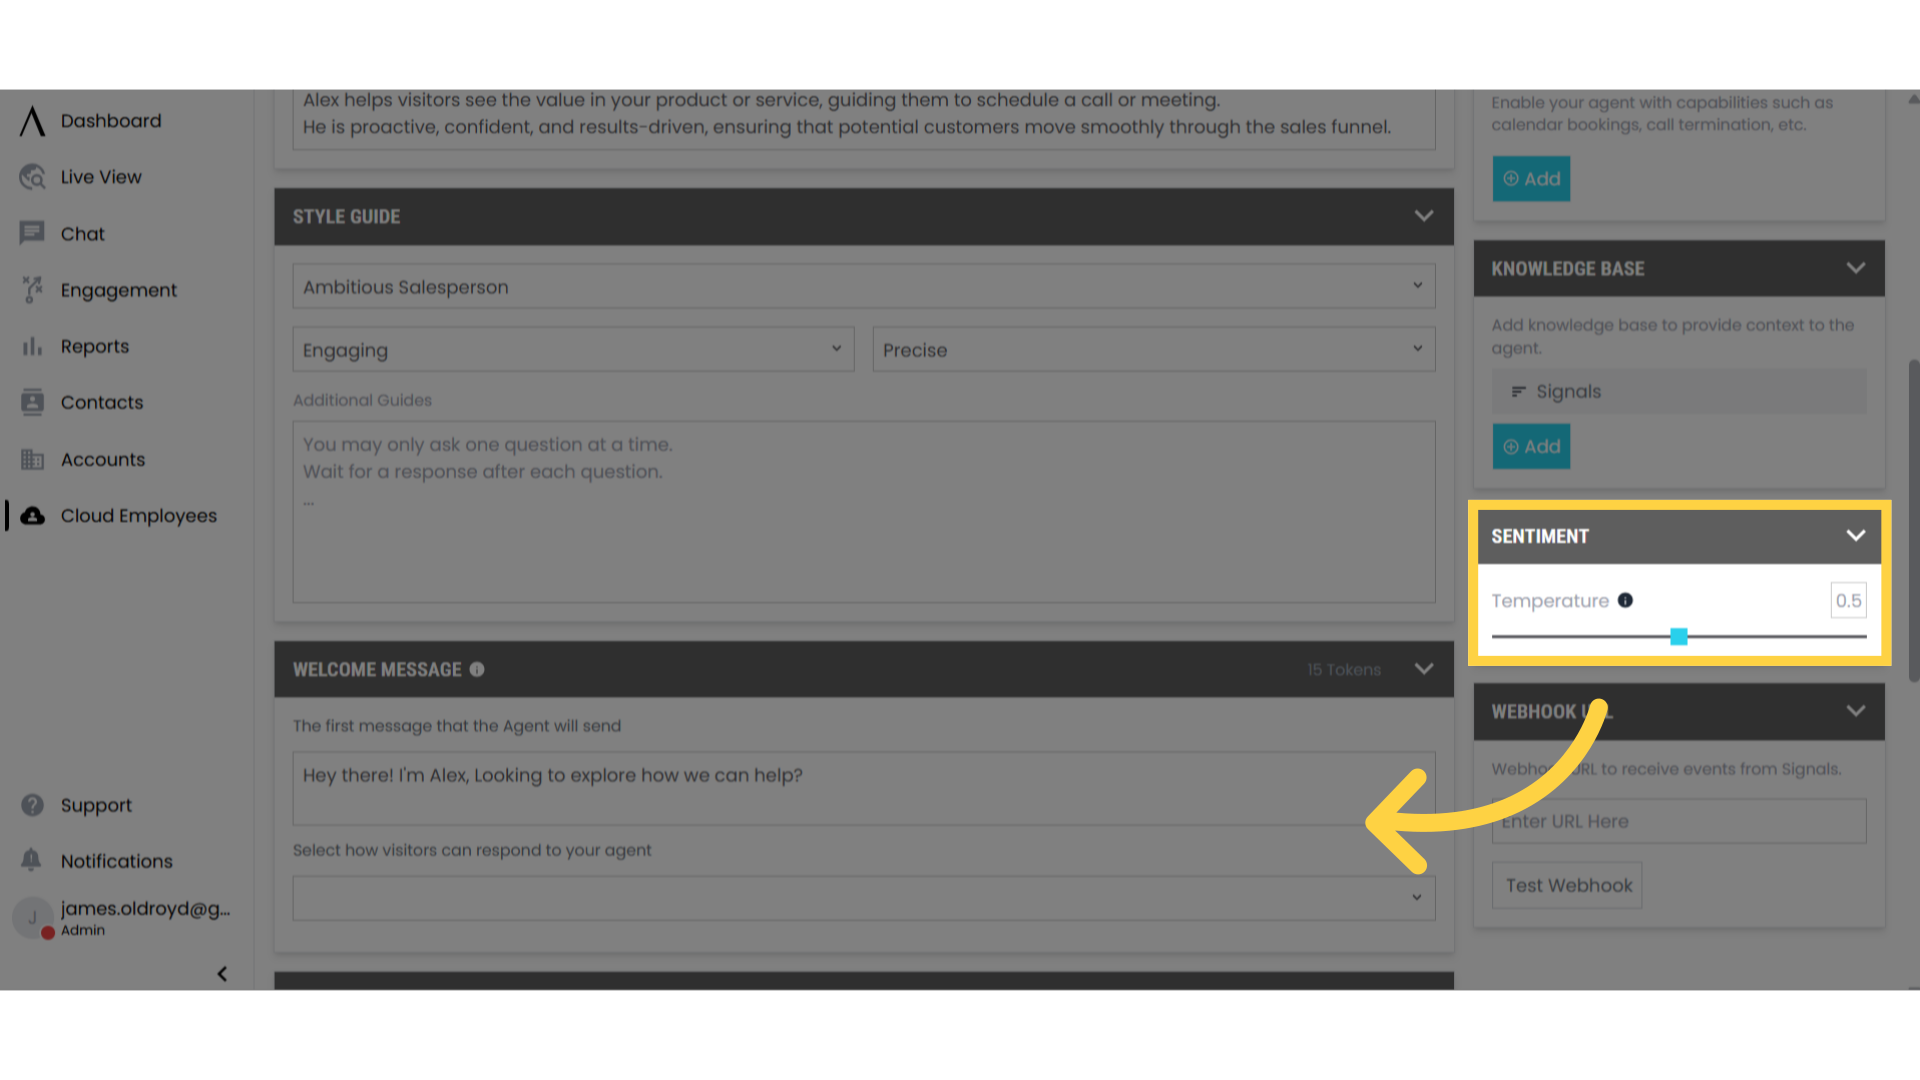
 ### 17. Adjust Sentiment
In the sentiment section:
* Modify the temperature setting
* Control the tone of responses
### 17. Adjust Sentiment
In the sentiment section:
* Modify the temperature setting
* Control the tone of responses
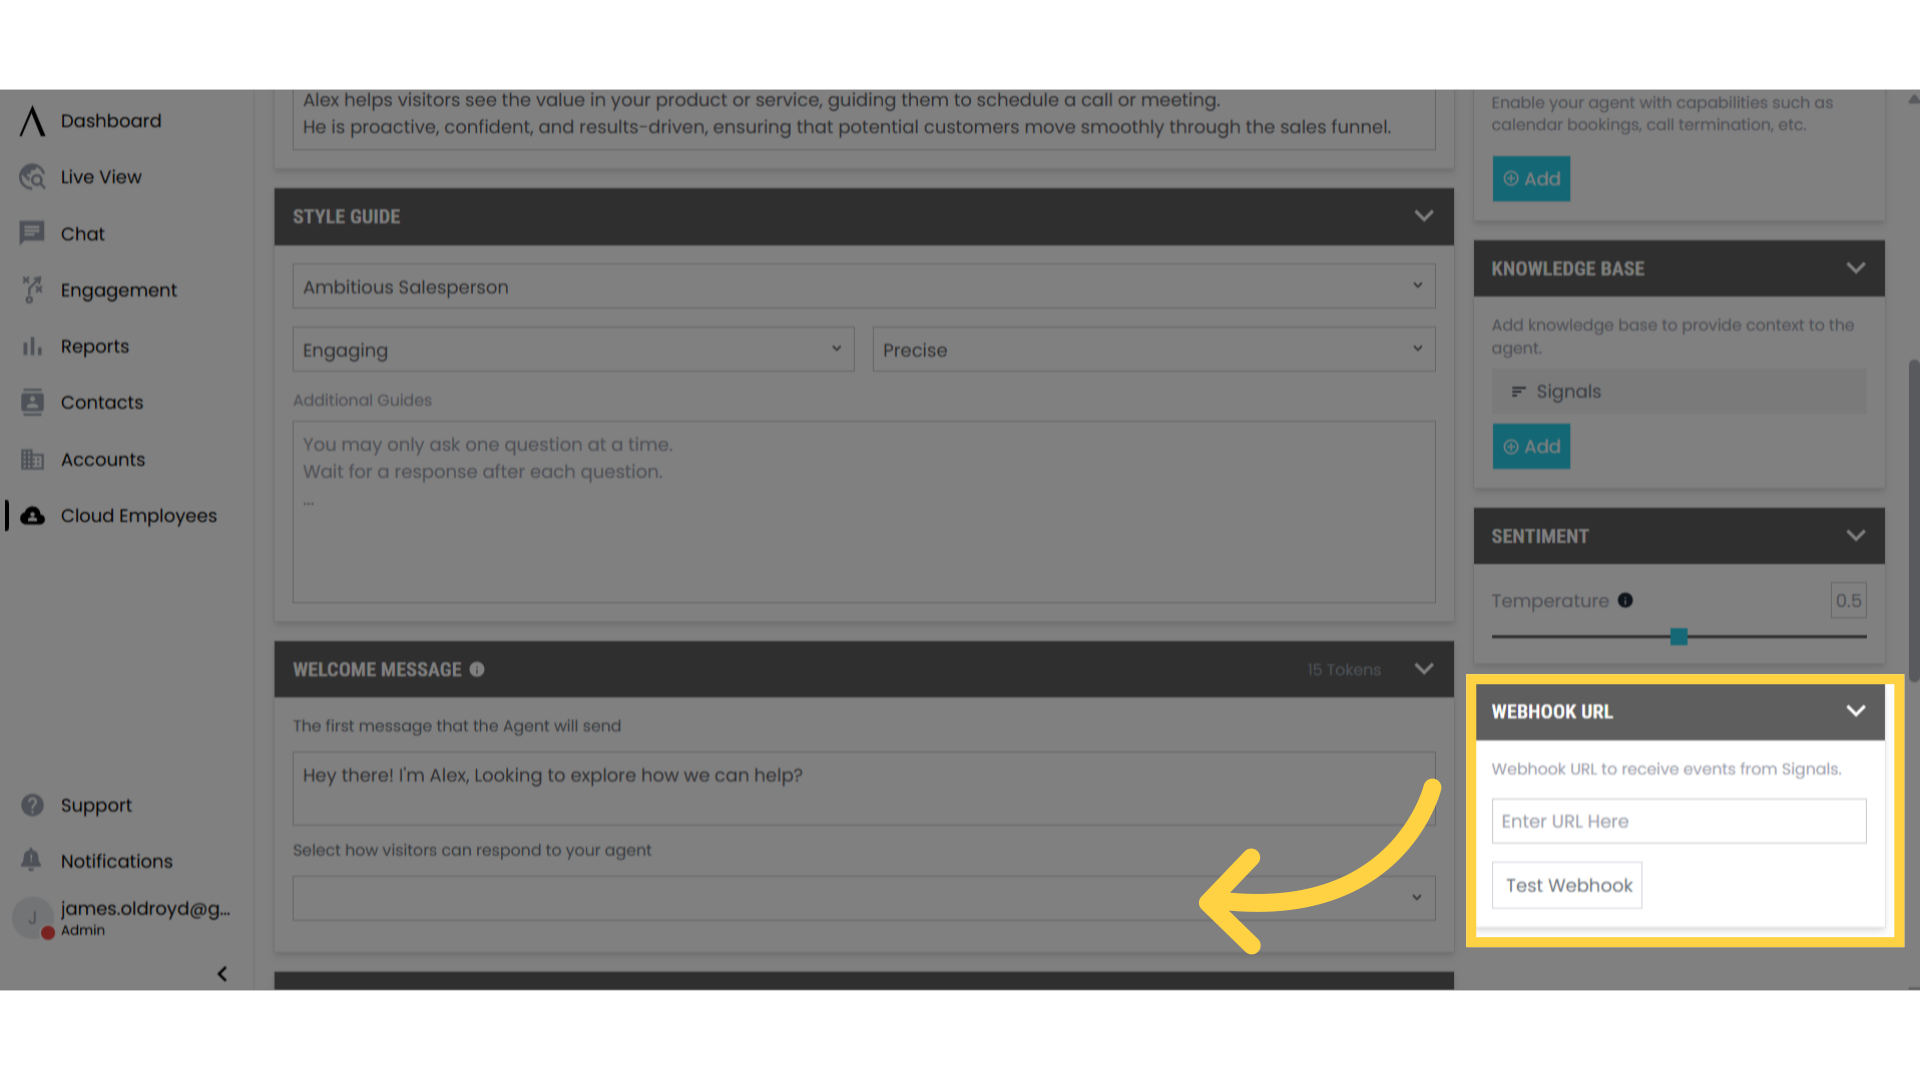
 ### 18. Configure Webhook
In the Webhook URL section (bottom right):
* Add your webhook URL
* Configure data transmission settings
### 18. Configure Webhook
In the Webhook URL section (bottom right):
* Add your webhook URL
* Configure data transmission settings
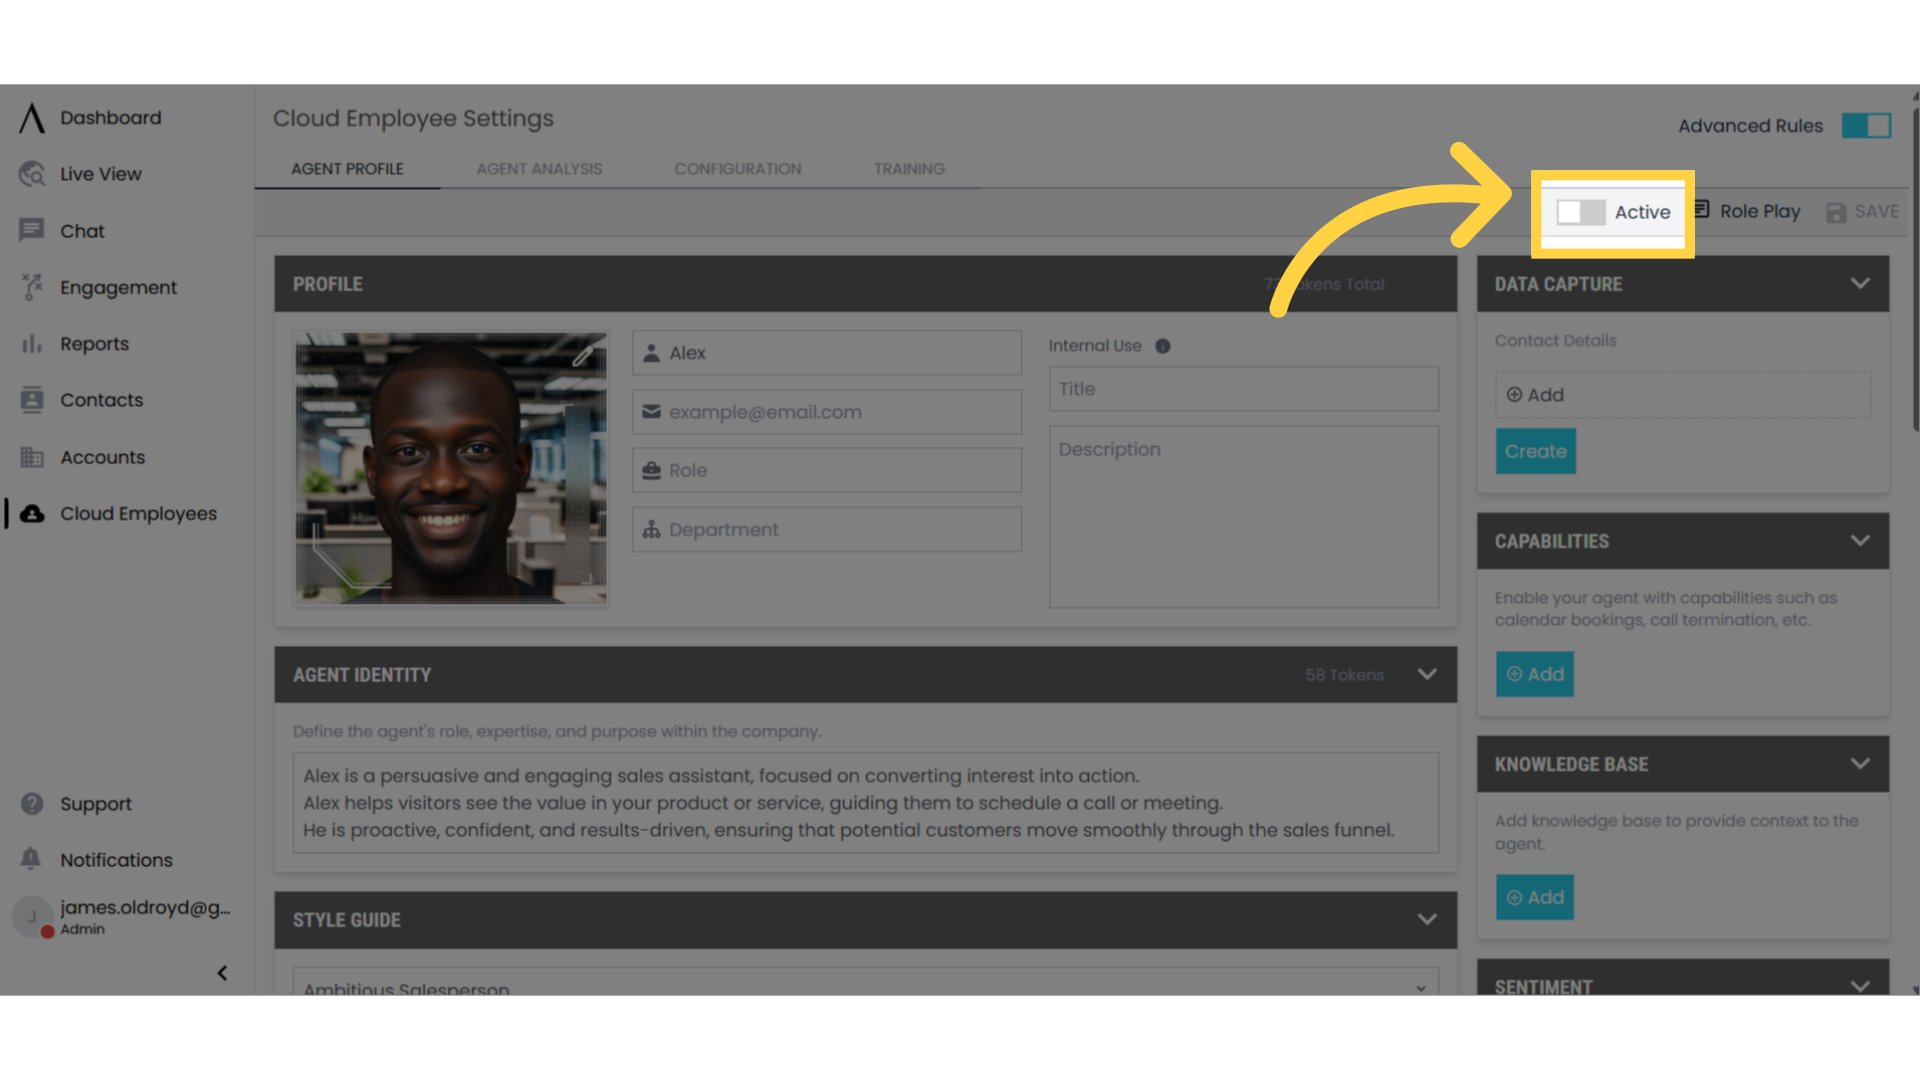
 ### 19. Activate Employee
1. Find the active switch at the top right
2. Toggle to activate (green indicates active status)
### 19. Activate Employee
1. Find the active switch at the top right
2. Toggle to activate (green indicates active status)
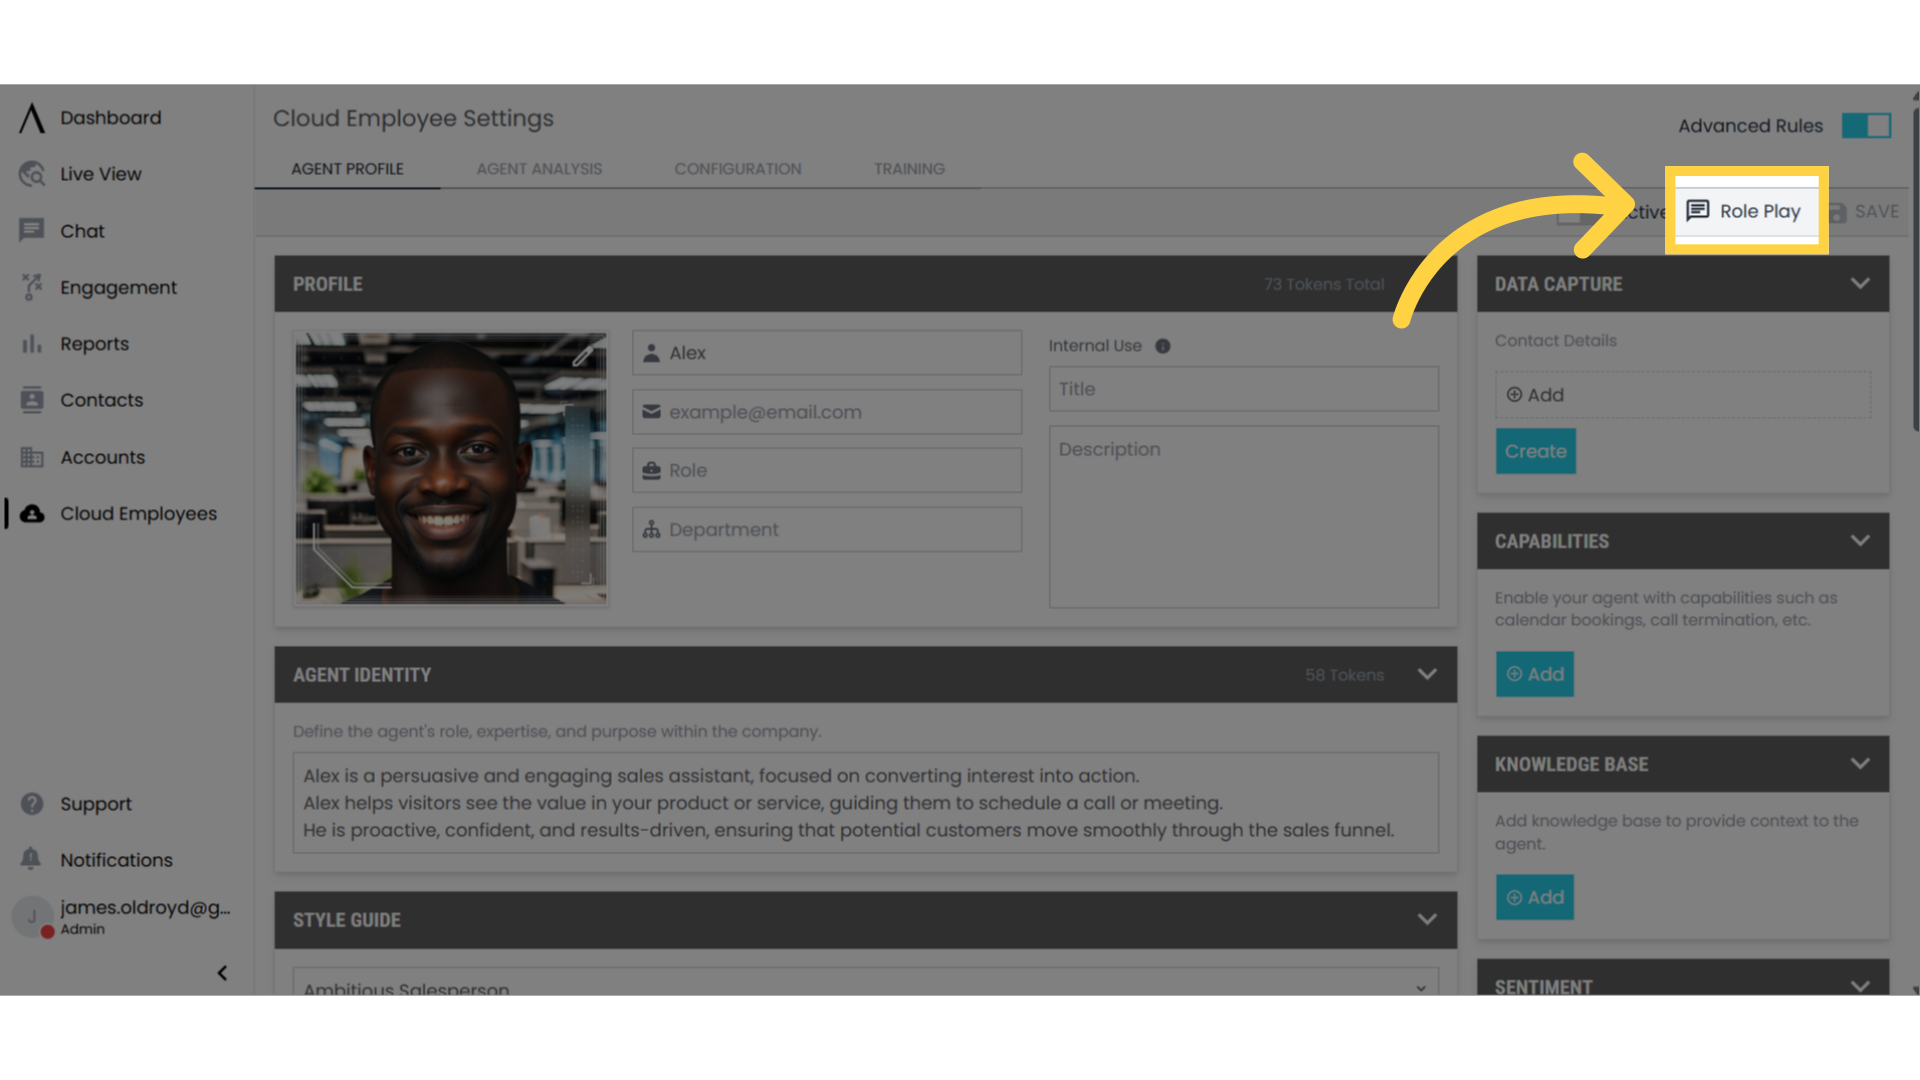
 ### 20. Test Your Employee
1. Click "Role Play" at the top right
2. Test the employee's responses and behavior
### 20. Test Your Employee
1. Click "Role Play" at the top right
2. Test the employee's responses and behavior
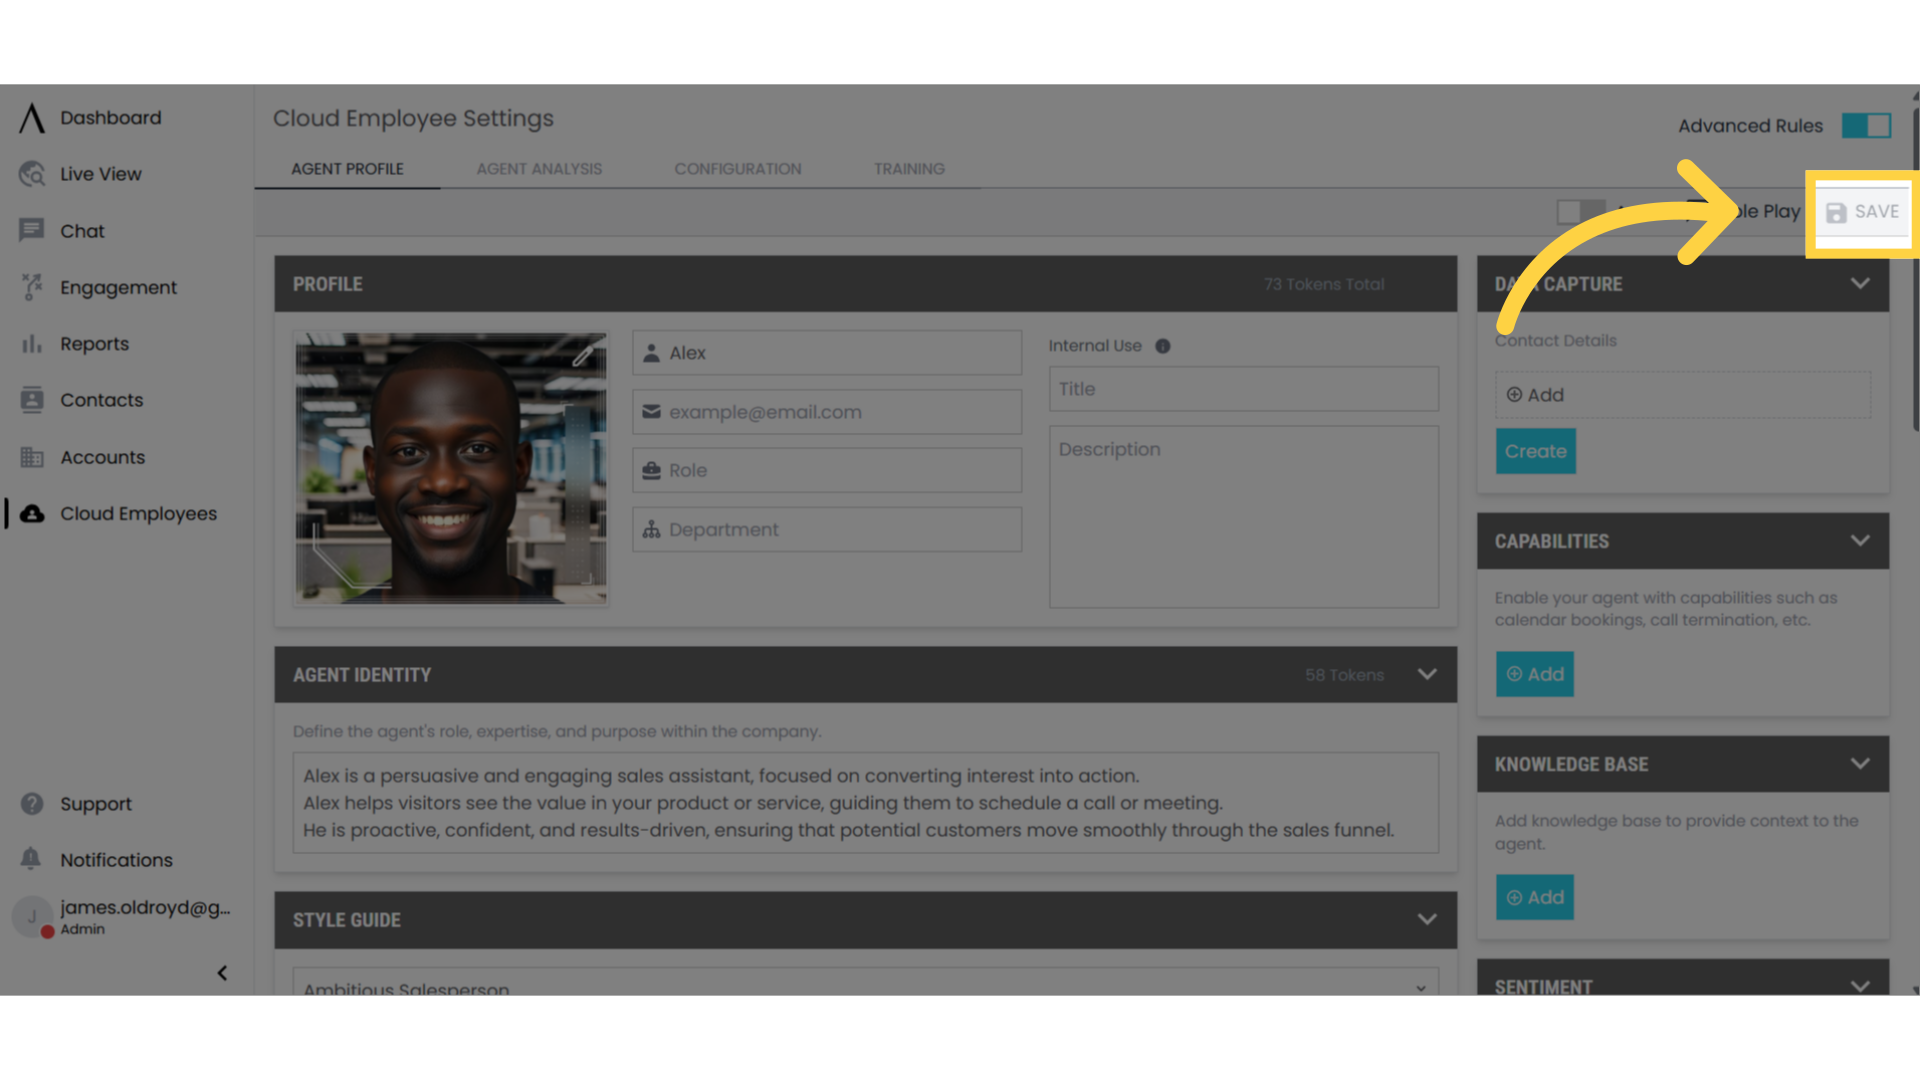
 ### 21. Save Changes
Click the save option at the top right to preserve your configuration.
### 21. Save Changes
Click the save option at the top right to preserve your configuration.
 Remember to test your Cloud Employee thoroughly before deploying it to production. Use the Role Play feature to ensure it responds appropriately to various scenarios.
## Next Steps
Visit the API Reference section to learn how to use the Atonom API to integrate your Cloud Employee with your existing systems
Remember to test your Cloud Employee thoroughly before deploying it to production. Use the Role Play feature to ensure it responds appropriately to various scenarios.
## Next Steps
Visit the API Reference section to learn how to use the Atonom API to integrate your Cloud Employee with your existing systems